SmartAdmin v1.8.x
Responsive Web Application Framework
- created: 01/19/2014
- latest update: 02/28/2016
- by: MyOrange
- email: support@myorange.ca
Thank you for purchasing SmartAdmin Responsive Web Application Framework. If you have any questions that are beyond the scope of this help file, please feel free to email us via the email address above.
Introduction
SmartAdmin Responsive Web Application Framework goes beyond the ordinary admin template. Its unique flat design and responsive layout is crafted one of a kind. SmartAdmin comes with 40+ customized jquery plugins including 5 unique plugins (exclusively catered for SmartAdmin). SmartAdmin Layout API lets you customize your project for almost any device - be it Mobile, Web or WebApp - SmartAdmin has you covered!
Bootstrap ua (Ukrainian)
Unpacking
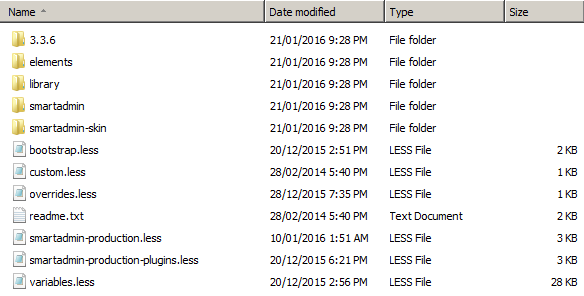
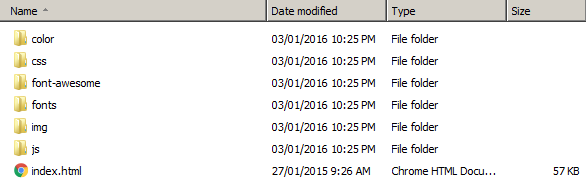
Once you have successfully downloaded SmartAdmin, you will notice right away that the zip folder contains the following:

Click the DEVELOPER directory and you will arrive to the choices below:

Both, AJAX and the HTML (NON-AJAX ) version for Smartadmin, looks and functions the same. However, the behaviour of the way how the navigation works and how the Scripts are loaded are different.
Select the appropriate version for your project to begin. If you are an ASP.NET WebForms user, it is best suited to go with the HTML_version (NON-AJAX).
Update: We have recently added three aditional versions (AngularJS, PHP, ReactJS(beta) and .NET MVC5 & 6RC1 version) all three come with its different uses and applications.

HTML VERSION
Features (these features also transcends Ajax version, AngularJS version, PHP, ReactJS and .Net MVC versions)
- Built with bootstrap 3.6.x (contains LESS/SASS files for the Custom BS Build)
- Carefully hand coded from head to toe
- Contains neatly organized and commended HTML, JS and LESS & SASS files (unminified CSS and JS files available)
- RTL Support
- Uses grunt tasks to compile CSS and minify scripts
- Fixed header, footer, breadcrumb and nav
- Retina Graphs and Icons
- w3 valid cross browser compatible HTML5 markup
- Unique, never seen before, localStorage Widgets (Jarvis Widget 2.0) with custom controls for the users (now includes a robust API)
- 6 Level responsive navigation
- Fully Responsive, scales to almost any size (Fluid/Responsive/Boxed and Container)
- Four different navigation options (horizontal, vertical, minify or hidden - no DOM changes required to switch in-between). Menu also adapts automatically on mobile devices
- CSS3 Animated
- Modern Form Elements (jQuery select2, colorpicker, datepicker, validation, iDevice buttons and wizard)
- Custom Google map skins
- Data attribute gallery
- Smart Alert and Smart Notification with sound
- Dynamic Data Table with export to PDF/Excel
- Smart Form elements (built on top of bootstrap library for robust form development)
- Google chrome voice command plugin
- Crossbrowser (IE9+)
- Print ready Invoice page
- All configurable options located in a seperate JS file "app.config.js"
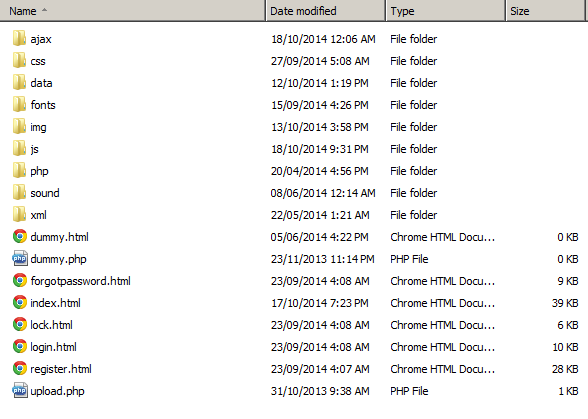
You will find the following file structure for the NON-AJAX (HTML version)
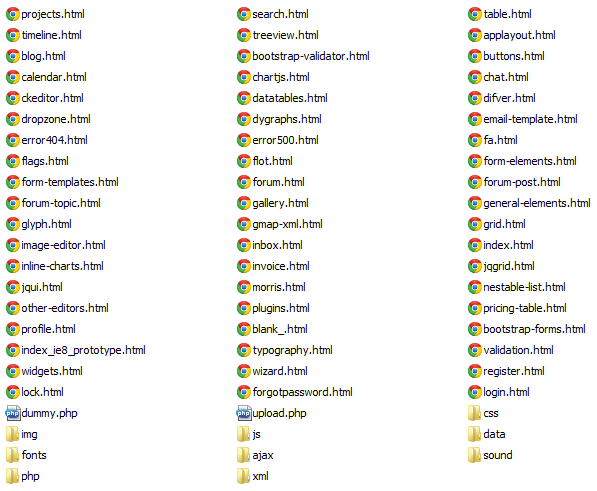
The non-Ajax version of SmartAdmin is pretty straight forward. Just treat it like any regular HTML template.
The navigation for the non-AJAX version works different compared to the AJAX version. In order to enable this behavior, we turned off the ajax call method by opening app.config.js and setting $.navAsAjax to false.
Note: Although the HTML_version is mostly pure HTML, some pages, like the Inbox and notification messages still use AJAX calls to load its content. Which means the template will need to be running from a server in order to work properly.
AJAX VERSION
pageDestroy() function to destroy objects and take care of those nasty memory leaks!Features
This extendeds features from the HTML (non-ajax) version
- Built to run as a one page app (never refresh again)
- AJAX pages (pages are pulled in and scripts are loaded on request per page)
- Lazy loads scripts, plugins and styles
- Jquery animated page transitions
- Loading bar
- Breadcrumbs created dynamically
- Contains page destroy function for memory leaks
- Easily managed
File Structure
Open "ajax" folder and you will notice all the pages here have no styles or direct links to plugins. In fact if you try to open any of the pages in your browser they will not display properly. These are AJAX pages, these pages get pulled in via the app.js and render inside the #content div of the index.html file.
To explain better how these pages work, lets open the blank_.html file using your favorite HTML editor:
1 2 3 4 5 6 7 8 9 10 11 12 13 14 15 16 17 18 19 20 21 22 23 24 25 26 27 28 29 30 31 32 33 34 35 36 37 38 39 40 41 42 43 44 45 46 47 48 49 50 51 52 53 54 55 56 57 58 59 60 61 62 63 64 65 66 67 68 69 70 71 72 73 74 75 76 77 78 79 80 81 82 83 84 85 86 87 88 89 90 91 92 93 94 95 96 97 98 99 100 101 102 103 104 105 106 107 108 109 110 111 112 113 114 115 116 117 118 119 120 121 122 123 124 125 126 127 |
<!-- Bread crumb is created dynamically --> <!-- row --> <div class="row"> <!-- col --> <div class="col-xs-12 col-sm-7 col-md-7 col-lg-4"> <h1 class="page-title txt-color-blueDark"><!-- PAGE HEADER --> Page Header <span>> Subtitle</span></h1> </div><!-- end col --> <!-- right side of the page with the sparkline graphs --> <!-- col --> <div class="col-xs-12 col-sm-5 col-md-5 col-lg-8"> <!-- sparks --> <ul id="sparks"> [SPARKLINE] </ul><!-- end sparks --> </div><!-- end col --> </div><!-- end row --> <!-- widget grid --> <section class="" id="widget-grid"> <!-- row --> <div class="row"> <!-- NEW WIDGET START --> <article class="col-xs-12 col-sm-12 col-md-12 col-lg-12"> [WIDGET] </article><!-- WIDGET END --> </div><!-- end row --> <!-- row --> <div class="row"> <!-- a blank row to get started --> <div class="col-sm-12"> <!-- your contents here --> </div> </div><!-- end row --> </section><!-- end widget grid --> <script type="text/javascript"> /* DO NOT REMOVE : GLOBAL FUNCTIONS! * * pageSetUp(); WILL CALL THE FOLLOWING FUNCTIONS * * // activate tooltips * $("[rel=tooltip]").tooltip(); * * // activate popovers * $("[rel=popover]").popover(); * * // activate popovers with hover states * $("[rel=popover-hover]").popover({ trigger: "hover" }); * * // activate inline charts * runAllCharts(); * * // setup widgets * setup_widgets_desktop(); * * // run form elements * runAllForms(); * ******************************** * * pageSetUp() is needed whenever you load a page. * It initializes and checks for all basic elements of the page * and makes rendering easier. * */ pageSetUp(); /* * ALL PAGE RELATED SCRIPTS CAN GO BELOW HERE * eg alert("my home function"); * * var pagefunction = function() { * ... * } * loadScript("js/plugin/_PLUGIN_NAME_.js", pagefunction); * * TO LOAD A SCRIPT: * var pagefunction = function (){ * loadScript(".../plugin.js", run_after_loaded); * } * * OR you can load chain scripts by doing * * loadScript(".../plugin.js", function(){ * loadScript("../plugin.js", function(){ * ... * }) * }); */ // pagefunction var pagefunction = function() { // clears the variable if left blank }; // end pagefunction // destroy generated instances // pagedestroy is called automatically before loading a new page // only usable in AJAX version! var pagedestroy = function(){ /* Example below: $("#calednar").fullCalendar( 'destroy' ); if (debugState){ root.console.log("✔ Calendar destroyed"); } For common instances, such as Jarviswidgets, Google maps, and Datatables, are automatically destroyed through the app.js loadURL mechanic */ } // end destroy // run pagefunction pagefunction(); </script> |
Ajax Nav
app.js will make a call using the ajax function and load the the content of the pages and places it insde the <div id="container"> element. To view how this works, let's look at the SmartAdmin main navigation link structure:
The hash tag is added automatically for all main nav links
1 2 3 4 5 6 7 8 9 10 11 12 13 |
<ul> <li class=""><a href="ajax/dashboard.html" title= "Dashboard"><span class="menu-item-parent">Dashboard</span></a></li> <li><a href="ajax/inbox.html"><span class="menu-item-parent">Inbox</span><span class="badge pull-right inbox-badge">14</span></a></li> <li> <a href="#"><span class="menu-item-parent">Graphs</span></a> <ul> <li><a href="ajax/flot.html">Flot Chart</a></li> <li><a href="ajax/morris.html">Morris Charts</a></li> <li><a href="ajax/inline-charts.html">Inline Charts</a></li> </ul> </li> </ul> |
The following function in app.js will sort out the links using the following code:
1 2 3 4 5 6 7 8 9 10 11 12 13 14 15 16 17 18 19 20 21 22 23 24 25 26 27 28 29 30 31 32 33 34 |
$(document).on('click', 'nav a[href!="#"]', function(e) { e.preventDefault(); var $this = $(e.currentTarget); // if parent is not active then get hash, or else page is assumed to be loaded if (!$this.parent().hasClass("active") && !$this.attr('target')) { // update window with hash // you could also do here: thisDevice === "mobile" - and save a little more memory if ($.root_.hasClass('mobile-view-activated')) { $.root_.removeClass('hidden-menu'); $('html').removeClass("hidden-menu-mobile-lock"); window.setTimeout(function() { if (window.location.search) { window.location.href = window.location.href .replace(window.location.search, '').replace( window.location.hash, '') + '#' + $this.attr('href'); } else { window.location.hash = $this.attr('href'); } }, 150); // it may not need this delay... } else { if (window.location.search) { window.location.href = window.location.href.replace( window.location.search, '').replace(window.location .hash, '') + '#' + $this.attr('href'); } else { window.location.hash = $this.attr('href'); } } // clear DOM reference // $this = null; } }); |
1 2 3 4 5 6 7 8 9 10 11 12 13 14 15 16 17 18 19 20 21 22 23 24 25 26 27 28 29 30 31 32 33 34 35 36 37 38 39 40 41 42 43 44 45 46 47 |
/* * CHECK TO SEE IF URL EXISTS */ function checkURL() { //get the url by removing the hash //var url = location.hash.replace(/^#/, ''); var url = location.href.split('#').splice(1).join('#'); //BEGIN: IE11 Work Around if (!url) { try { var documentUrl = window.document.URL; if (documentUrl) { if (documentUrl.indexOf('#', 0) > 0 && documentUrl.indexOf( '#', 0) < (documentUrl.length + 1)) { url = documentUrl.substring(documentUrl.indexOf('#', 0) + 1); } } } catch (err) {} } //END: IE11 Work Around container = $('#content'); // Do this if url exists (for page refresh, etc...) if (url) { // remove all active class $('nav li.active').removeClass("active"); // match the url and add the active class $('nav li:has(a[href="' + url + '"])').addClass("active"); var title = ($('nav a[href="' + url + '"]').attr('title')); // change page title from global var document.title = (title || document.title); // debugState if (debugState) { root.console.log("Page title: %c " + document.title, debugStyle_green); } // parse url to jquery loadURL(url + location.search, container); } else { // grab the first URL from nav var $this = $('nav > ul > li:first-child > a[href!="#"]'); //update hash window.location.hash = $this.attr('href'); //clear dom reference $this = null; } } |
IMPORTANT: We have made recenty changes to the loadURL method, you can find the latest structure inside the app.js file
The loadURL function works as following:
1 2 3 4 5 6 7 8 9 10 11 12 13 14 15 16 17 18 19 20 21 22 23 24 25 26 27 28 29 30 31 32 33 34 35 36 37 38 39 40 41 42 43 44 45 46 47 48 49 50 51 52 53 54 55 56 57 58 59 60 61 62 63 64 65 66 67 68 69 70 71 72 73 74 75 76 77 78 79 80 81 82 83 84 85 86 87 88 89 90 91 92 93 94 95 96 97 98 99 100 101 102 103 104 105 106 107 108 109 110 111 112 113 114 115 116 117 118 119 120 121 122 123 124 125 126 127 128 129 130 131 132 133 134 135 136 137 138 139 140 141 142 143 144 145 146 147 148 149 150 151 152 153 154 155 156 157 158 159 160 161 162 163 164 165 166 167 168 169 170 171 172 173 174 175 176 177 178 179 180 181 182 183 184 185 186 187 188 189 190 191 192 193 194 195 196 197 198 199 200 201 202 203 204 205 206 207 208 209 210 211 212 213 214 215 216 217 218 219 220 221 222 223 224 225 226 227 228 229 230 231 232 233 234 235 |
/* * LOAD AJAX PAGES */ function loadURL(url, container) { // debugState if (debugState) { root.root.console.log("Loading URL: %c" + url, debugStyle); } $.ajax({ type: "GET", url: url, dataType: 'html', cache: true, // (warning: setting it to false will cause a timestamp and will call the request twice) beforeSend: function() { //IE11 bug fix for googlemaps (delete all google map instances) //check if the page is ajax = true, has google map class and the container is #content if ($.navAsAjax && $(".google_maps")[0] && ( container[0] == $("#content")[0])) { // target gmaps if any on page var collection = $(".google_maps"), i = 0; // run for each map collection.each(function() { i++; // get map id from class elements var divDealerMap = document.getElementById( this.id); if (i == collection.length + 1) { // "callback" } else { // destroy every map found if (divDealerMap) divDealerMap.parentNode .removeChild(divDealerMap); // debugState if (debugState) { root.console.log( "Destroying maps.........%c" + this.id, debugStyle_warning); } } }); // debugState if (debugState) { root.console.log( "✔ Google map instances nuked!!!"); } } //end fix // destroy all datatable instances if ($.navAsAjax && $('.dataTables_wrapper')[0] && ( container[0] == $("#content")[0])) { var tables = $.fn.dataTable.fnTables(true); $(tables).each(function() { if ($(this).find('.details-control') .length != 0) { $(this).find('*').addBack().off() .remove(); $(this).dataTable().fnDestroy(); } else { $(this).dataTable().fnDestroy(); } }); // debugState if (debugState) { root.console.log( "✔ Datatable instances nuked!!!"); } } // end destroy // pop intervals (destroys jarviswidget related intervals) if ($.navAsAjax && $.intervalArr.length > 0 && ( container[0] == $("#content")[0]) && enableJarvisWidgets) { while ($.intervalArr.length > 0) clearInterval( $.intervalArr.pop()); // debugState if (debugState) { root.console.log( "✔ All JarvisWidget intervals cleared" ); } } // end pop intervals // destroy all widget instances if ($.navAsAjax && (container[0] == $("#content")[0]) && enableJarvisWidgets && $("#widget-grid")[0]) { $("#widget-grid").jarvisWidgets('destroy'); // debugState if (debugState) { root.console.log( "✔ JarvisWidgets destroyed"); } } // end destroy all widgets // cluster destroy: destroy other instances that could be on the page // this runs a script in the current loaded page before fetching the new page if ($.navAsAjax && (container[0] == $("#content")[0])) { /* * The following elements should be removed, if they have been created: * * colorList * icon * picker * inline * And unbind events from elements: * * icon * picker * inline * especially $(document).on('mousedown') * It will be much easier to add namespace to plugin events and then unbind using selected namespace. * * See also: * * http://f6design.com/journal/2012/05/06/a-jquery-plugin-boilerplate/ * http://keith-wood.name/pluginFramework.html */ // this function is below the pagefunction for all pages that has instances if (typeof pagedestroy == 'function') { try { pagedestroy(); if (debugState) { root.console.log("✔ Pagedestroy()"); } } catch (err) { pagedestroy = undefined; if (debugState) { root.console.log( "! Pagedestroy() Catch Error" ); } } } // destroy all inline charts if ($.fn.sparkline && $("#content .sparkline")[ 0]) { $("#content .sparkline").sparkline( 'destroy'); if (debugState) { root.console.log( "✔ Sparkline Charts destroyed!" ); } } if ($.fn.easyPieChart && $( "#content .easy-pie-chart")[0]) { $("#content .easy-pie-chart").easyPieChart( 'destroy'); if (debugState) { root.console.log( "✔ EasyPieChart Charts destroyed!" ); } } // end destory all inline charts // destroy form controls: Datepicker, select2, autocomplete, mask, bootstrap slider if ($.fn.select2 && $("#content select.select2")[ 0]) { $("#content select.select2").select2( 'destroy'); if (debugState) { root.console.log("✔ Select2 destroyed!"); } } if ($.fn.mask && $('#content [data-mask]')[0]) { $('#content [data-mask]').unmask(); if (debugState) { root.console.log( "✔ Input Mask destroyed!"); } } if ($.fn.datepicker && $('#content .datepicker')[ 0]) { $('#content .datepicker').off(); $('#content .datepicker').remove(); if (debugState) { root.console.log( "✔ Datepicker destroyed!"); } } if ($.fn.slider && $('#content .slider')[0]) { $('#content .slider').off(); $('#content .slider').remove(); if (debugState) { root.console.log( "✔ Bootstrap Slider destroyed!" ); } } // end destroy form controls } // end cluster destroy // empty container and var to start garbage collection (frees memory) pagefunction = null; container.removeData().html(""); // place cog container.html( '<h1 class="ajax-loading-animation"><i class="fa fa-cog fa-spin"></i> Loading...</h1>' ); // Only draw breadcrumb if it is main content material if (container[0] == $("#content")[0]) { // clear everything else except these key DOM elements // we do this because sometime plugins will leave dynamic elements behind $('body').find('> *').filter(':not(' + ignore_key_elms + ')').empty().remove(); // draw breadcrumb drawBreadCrumb(); // scroll up $("html").animate({ scrollTop: 0 }, "fast"); } // end if }, success: function(data) { // dump data to container container.css({ opacity: '0.0' }).html(data).delay(50).animate({ opacity: '1.0' }, 300); // clear data var data = null; container = null; }, error: function(xhr, status, thrownError, error) { container.html( '<h4 class="ajax-loading-error"><i class="fa fa-warning txt-color-orangeDark"></i> Error requesting <span class="txt-color-red">' + url + '</span>: ' + xhr.status + ' <span style="text-transform: capitalize;">' + thrownError + '</span></h4>'); }, async: true }); } |
1 2 3 4 5 6 7 8 9 10 11 12 13 14 15 16 17 18 19 20 |
// fire links with targets on different window $(document).on('click', 'nav a[target="_blank"]', function(e) { e.preventDefault(); $this = $(e.currentTarget); window.open($this.attr('href')); }); // fire links with targets on same window $(document).on('click', 'nav a[target="_top"]', function(e) { e.preventDefault(); $this = $(e.currentTarget); window.location = ($this.attr('href')); }); // all links with hash tags are ignored $(document).on('click', 'nav a[href="#"]', function(e) { e.preventDefault(); }); |
1 2 3 4 5 6 7 8 9 10 11 12 13 |
// fire links with targets on different window $(document).on('click', 'nav a[target="_blank"]', function(e) { e.preventDefault(); $this = $(e.currentTarget); window.open($this.attr('href')); }); // fire links with targets on same window $(document).on('click', 'nav a[target="_top"]', function(e) { e.preventDefault(); $this = $(e.currentTarget); window.location = ($this.attr('href')); }); |
You can also load pages within the content by adding a hashtag in front of the URL for example
<a href="#ajax/mypage.php"> load my page </a> // this will load the following content into the main container.
Loading Scripts via AJAX
SmartAdmin AJAX loads scripts dynamically and uses a lazy load method to accomplish this. The following function handles the AJAX load method call:
loadScript("js/my_lovely_script.js", loadCompleteFunction);
You can use this method to concatinate a chain of scripts such as:
loadScript("js/script1.js", loadScript_2);

function loadScript_2() {
    loadScript("js/script2.js", loadApp);
}

function loadApp() {
    loadScript("js/myapp.js", runApp);
}
The loadScript() function works as follows:
1 2 3 4 5 6 7 8 9 10 11 12 13 14 15 16 17 18 19 20 21 22 23 24 25 |
var jsArray = {}; // keeps track of all loaded scripts function loadScript(scriptName, callback) { if (!jsArray[scriptName]) { jsArray[scriptName] = true; // adding the script tag to the head as suggested before var body = document.getElementsByTagName('body')[0]; var script = document.createElement('script'); script.type = 'text/javascript'; script.src = scriptName; // then bind the event to the callback function // there are several events for cross browser compatibility //script.onreadystatechange = callback; script.onload = callback; // fire the loading body.appendChild(script); } else if (callback) { // changed else to else if(callback) //console.log("JS file already added!"); //execute function callback(); } } |
Ajax post
1 2 3 4 5 6 |
<form action="#ajax/search.html"> <input type="text" name="param" id="search-fld"> <button type="submit"> <i class="fa fa-search"></i> </button> </form> |
This will result the an URL key as follows:
smartadmin/?param=my_search_text#ajax/search.html
This can then later be extracted for form related operations and/or processing.
Ajax page setup (scripts in the bottom)
1 2 3 4 5 6 7 8 9 10 11 12 13 14 15 16 17 18 19 20 21 22 23 24 25 26 27 28 29 30 31 32 33 34 35 36 37 38 39 40 41 42 43 44 45 46 47 48 49 50 51 52 53 54 55 56 57 58 59 60 61 62 63 64 65 66 67 68 69 70 71 72 73 74 75 76 77 78 79 80 81 82 83 84 85 86 87 88 89 90 |
<script type="text/javascript"> /* DO NOT REMOVE : GLOBAL FUNCTIONS! * * pageSetUp(); WILL CALL THE FOLLOWING FUNCTIONS * * // activate tooltips * $("[rel=tooltip]").tooltip(); * * // activate popovers * $("[rel=popover]").popover(); * * // activate popovers with hover states * $("[rel=popover-hover]").popover({ trigger: "hover" }); * * // activate inline charts * runAllCharts(); * * // setup widgets * setup_widgets_desktop(); * * // run form elements * runAllForms(); * ******************************** * * pageSetUp() is needed whenever you load a page. * It initializes and checks for all basic elements of the page * and makes rendering easier. * */ pageSetUp(); /* * ALL PAGE RELATED SCRIPTS CAN GO BELOW HERE * eg alert("my home function"); * * var pagefunction = function() { * ... * } * loadScript("js/plugin/_PLUGIN_NAME_.js", pagefunction); * * TO LOAD A SCRIPT: * var pagefunction = function (){ * loadScript(".../plugin.js", run_after_loaded); * } * * OR you can load chain scripts by doing * * loadScript(".../plugin.js", function(){ * loadScript("../plugin.js", function(){ * ... * }) * }); */ // pagefunction var pagefunction = function() { // clears the variable if left blank }; // end pagefunction // destroy generated instances // pagedestroy is called automatically before loading a new page // only usable in AJAX version! var pagedestroy = function(){ /* Example below: $("#calednar").fullCalendar( 'destroy' ); if (debugState){ root.console.log("✔ Calendar destroyed"); } For common instances, such as Jarviswidgets, Google maps, and Datatables, are automatically destroyed through the app.js loadURL mechanic */ } // end destroy // run pagefunction pagefunction(); </script> |
AngularJS Version
1.8.0 UPDATE:
With version 1.8.0 we have made the following changes
- Updated dependency to Angular 1.4.8 (stable)
-
Split code to two layers:
-
directives for plugins (system layer)
-
presentational layer ( routing, pages etc...)
-
-
Add bower package manager
-
Change code bundler from gulp to webpack
------------------------
AngularJS (reloaded) brings you a brand new version built from ground up using Gulp and Bower package managers. It is now packed with robust features, a RESTful API with JSON files and a file structure that is neat as a pin.
Features
This extendeds features from the HTML (non-ajax) version
- Pure CSS3 Page Transitions
- Angular Router (with nested routes)
- i18n languages support (translation loaded from .js files)
- Lazy Load scripts
- Menu: Condensed, Offcanvas, Collapsed and Menu on top
- Validation ready Forms
- Wizard with validation
- Mobile fast click
- Widgets utility classes
- CSS3 Spinners
- RESTful API with JSON files for Chat, Calendar Events, Inbox & Messages, Project list and Todo's
- In-app Settings (with autosave)
- +80 directives (very modular)
- Complete Modularized AngluarJS structure, getting you more closer to integrate with a backend
- Solid Workflow, dependencies (plugins) managment with Twitter Bower, tasks automation with Gulp just like Twitter Bootstrap project, make all things organised.
- Internationalization (i18n) and Localization (l10n) support.
Usage
- From your node.js point to the AngularJS directory
- run 'npm install' to install all gulp required plugins
- run 'gulp'
- run http://localhost:8888 on your browser to see app is working
"bootstrap-markdown": "plugin/bootstrap-markdown/js/bootstrap-markdown.js"
"bootstrap-markdown": { "deps": ["markdown", "to-markdown"]}
How to lazy load
To lazy load scripts you can use *lazyScript* factoy. For example in ui-router state resolve:
PHP Version (AJAX/HTML)
We felt the need to extend to our PHP based customers - based on feedback and requests we have created a PHP version and implemented the following classes for SmartAdmin:
- Added function class for Datatables
- Localized assets folder
- SmartUI Class framework for:
- Widget
- Datatable
- Button
- Alert
- Progressbar
- Msgbox
- Tab
- Accordion
- Carousel
- Smart Form classes include: text, select, radio, checkbox, switch, rating
- SmartNav
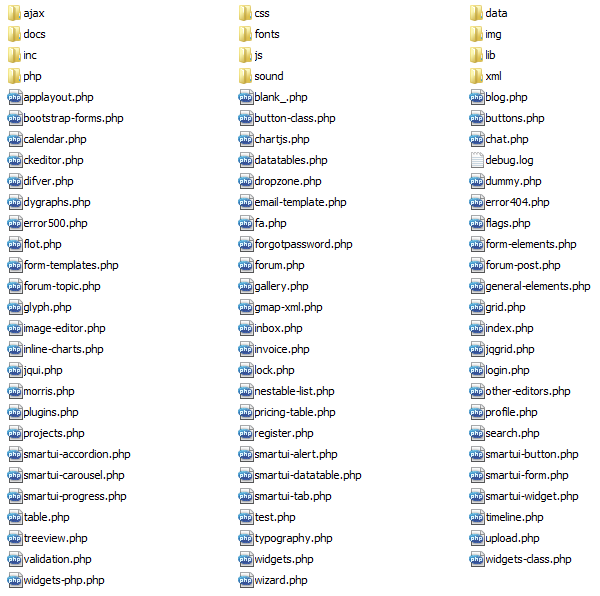
File Structure
1 2 3 4 5 6 7 8 9 10 11 12 13 14 15 16 17 18 19 20 21 22 23 24 25 26 27 28 29 30 31 32 33 34 35 36 37 38 39 40 41 42 43 44 45 46 47 48 49 50 51 52 53 54 55 56 |
<?php //initilize the page require_once("inc/init.php"); //require UI configuration (nav, ribbon, etc.) require_once("inc/config.ui.php"); /*---------------- PHP Custom Scripts --------- YOU CAN SET CONFIGURATION VARIABLES HERE BEFORE IT GOES TO NAV, RIBBON, ETC. */ /* ---------------- END PHP Custom Scripts ------------- */ //include header //you can add your custom css in $page_css array. //Note: all css files are inside css/ folder $page_css[] = "your_style.css"; include("inc/header.php"); //include left panel (navigation) //follow the tree in inc/config.ui.php include("inc/nav.php"); ?> <!-- ==========================CONTENT STARTS HERE ========================== --> <!-- MAIN PANEL --> <div id="main" role="main"> <?php include("inc/ribbon.php"); ?> <!-- MAIN CONTENT --> <div id="content"> </div> <!-- END MAIN CONTENT --> </div> <!-- END MAIN PANEL --> <!-- FOOTER --> <?php include("inc/footer.php"); ?> <!-- END FOOTER --> <!-- ==========================CONTENT ENDS HERE ========================== --> <?php //include required scripts include("inc/scripts.php"); //include footer include("inc/google-analytics.php"); ?> |
.NET MVC5 Version (HTML)
With having served the PHP community previously, we felt the time was right to also provide the SmartAdmin community with an ASP.NET MVC version. We wanted to make sure the MVC version is accesible and usable for a broad audience, and in order to achieve that, unique to the MVC version, we have included a step-by-step tutorial. The end result is a project template that is also included with this purchased version of SmartAdmin, and then some.
Our goal is to ensure that with every update of SmartAdmin the MVC version will be kept up-to-date, and will provide detailed steps in getting your current version migrated to the latest version of SmartAdmin MVC. We will do our very best in keeping these changes as simple as possible so you do not lose any precious time taking advantage of the newest features that come with each and every update to the template.
Questions and assistance with getting the template up and running can be asked at our brand new SmartAdmin Support site, so we invite you all to register and post your questions there, and if you are able to, help to answer questions of fellow SmartAdmin users; we highly recommend it! You might be able to pick up some nice tips and tricks in getting your project started!
If you require additional assistance that goes beyond the scope of the provided documentation you can always contact the author of the MVC5 project template at: smartadmin@walapa.nl
Features
This extendeds features from the HTML (non-ajax) version
- Uses bundling for serving the CSS and JS files, reducing server load and bandwith
- Comes with buil-in ASP.NET Identity support, out of the box authentication!
- Cleverly devided into easy to manage views and re-usable partial views for your convinience
- Contains several tricks and HTML helpers to ensure an even smoother integration with SmartAdmin!
- Uses a custom configuration mapping to control the theme from the familiar web.config
- Uses ViewModels to abstract the form validation from the data models for more control over your data
- And many many more, take a look inside for yourself!
File Structure

The contents of the main layout page is shown below, it has Bundling enabled and makes use of protocol relative URL's.
1 2 3 4 5 6 7 8 9 10 11 12 13 14 15 16 17 18 19 20 21 22 23 24 25 26 27 28 29 30 31 32 33 34 35 36 37 38 39 40 41 42 43 44 45 46 47 48 49 50 |
<!DOCTYPE html> <html lang="en-us" id="@ViewBag.PageId" class="@Settings.CurrentTheme"> <head> <meta charset=" utf-8"> <title> SmartAdmin - MVC5 </title> <meta name="description" content=""> <meta name="author" content=""> <meta name="viewport" content="width=device-width, initial-scale=1.0, maximum-scale=1.0, user-scalable=no"> <!-- Basic Styles --> @Styles.Render("~/content/smartadmin") <!-- FAVICONS --> <link rel="shortcut icon" href="~/content/img/favicon/favicon.ico" type="image/x-icon"> <link rel="icon" href="~/content/img/favicon/favicon.ico" type="image/x-icon"> <!-- GOOGLE FONT --> <link rel="stylesheet" href="//fonts.googleapis.com/css?family=Open+Sans:400italic,700italic,300,400,700"> <!-- Specifying a Webpage Icon for Web Clip Ref: https://developer.apple.com/library/ios/documentation/AppleApplications/Reference/SafariWebContent/ConfiguringWebApplications/ConfiguringWebApplications.html --> <link rel="apple-touch-icon" href="~/content/img/splash/sptouch-icon-iphone.png"> <link rel="apple-touch-icon" sizes="76x76" href="~/content/img/splash/touch-icon-ipad.png"> <link rel="apple-touch-icon" sizes="120x120" href="~/content/img/splash/touch-icon-iphone-retina.png"> <link rel="apple-touch-icon" sizes="152x152" href="~/content/img/splash/touch-icon-ipad-retina.png"> <!-- iOS web-app metas : hides Safari UI Components and Changes Status Bar Appearance --> <meta name="apple-mobile-web-app-capable" content="yes"> <meta name="apple-mobile-web-app-status-bar-style" content="black"> <!-- Startup image for web apps --> <link rel="apple-touch-startup-image" href="~/content/img/splash/ipad-landscape.png" media="screen and (min-device-width: 481px) and (max-device-width: 1024px) and (orientation:landscape)"> <link rel="apple-touch-startup-image" href="~/content/img/splash/ipad-portrait.png" media="screen and (min-device-width: 481px) and (max-device-width: 1024px) and (orientation:portrait)"> <link rel="apple-touch-startup-image" href="~/content/img/splash/iphone.png" media="screen and (max-device-width: 320px)"> </head> <body class="@ViewBag.PageClass @Settings.CurrentTheme"> @{ Html.RenderPartial("_Header", RenderSection("topright", false)); } @{ Html.RenderPartialIf("_Aside", Request.IsAuthenticated); } <div id="main" role="main"> @{ Html.RenderPartialIf("_Ribbon", Request.IsAuthenticated); } @RenderBody() </div> @if (Request.IsAuthenticated) { Html.RenderPartial("_Footer"); Html.RenderPartialIf("_Tiles", Settings.EnableTiles); } @{ Html.RenderPartial("_Scripts", RenderSection("pagespecific", false)); } </body> </html> |
.NET MVC6 (Experimental)
Now that MVC dust has settled in we feel it is important to stay connected not only to our community but also with technological advancement. We set a goal to make sure the MVC6 version would become accesible and usable for a broad audience, but in order to achieve that, it would require a rock solid stable version of MVC6. As of the time of the release MVC6 RC2 is being prepared by Microsoft with RTM on the near horizon but not just quite yet, the result is that this project is added for the tech savvy and the curious to try out and see for yourself how SmartAdmin could be implemented on top of the MVC6 stack that is about to rock the world.
Once MVC6 reaches RTM state we will be sure to include a fresh version of SmartAdmin with all the sweet additions that comes with having a stable build available. It is also the version that will receive the most priority and focus moving forward as we prepare for the next big release of SmartAdmin, with the MVC5 version slowly fading out over time. But that time has not come just yet, so in the meantime you get the best of both worlds, MVC5 and MVC6 in the same package with all the goodies you trust and love from the SmartAdmin team.
We hope you have an enjoyable time going through this exciting new project and are able to appreciate it as much as it was building for us. After all, who doesn't like new things right?
If you require additional assistance that goes beyond the scope of the provided documentation you can always contact the author of the MVC6 project template at: smartadmin@walapa.nl
Limitations and Remarks
- RenderPartial is currently not supported, should be added in RC2
- ActionResult is superceded by IActionResult
- HtmlHelper is superceded by IHtmlHelper
- Bundling (bundleconfig.json) is done using WebEssentials Stand-alone component: Bundler and Minifier
- LESS compiling is done using WebEssentials Stand-alone component: Web Compiler
- Web Essentials 2015.1 was used to maintain the current project structure but is not a dependency
- EF7 is initialized using a custom DatabaseInitializer that is called in Startup.Configure()
- NPM is currently not supported to maintain the client side libraries due to compatibility issues with SmartAdmin
ReactJS (beta)
Bundled with Webpack
- one for development (npm run dev)
- one for production ready build (npm run build).
How to run in development mode:
- Clone repo or point to the SmartAdmin ReactJS directory
- Run `npm install`
- Run `bower install`
Now with all dependencies installed
- Start the development server for seed project with `npm run dev`
- Point your browser to [http://localhost:14602](http://localhost:14602)
Seed Projects
Seed project resembles that of a seed, which you will grow over the course of your project cycle.
With version 1.8 we have introduced a new way to start your development. SeedProjects allow you to start with the bare minimum version of SmartAdmin. It is the very core of SmartAdmin, it only contains the absolute minimum components required to run SmartAdmin. It will have access to all of the basic features of the Bootstrap CSS without the SmartAdmin's custom elements and plugins.
- Copy the related JS files to your SeedProject from the Full_Version
- Open LESS or SASS directory and open "smartadmin-production-plugins.less"
- Then enable the plugin you would want to use
- And finally compile the LESS/SASS file to get the desired CSS file.
- Copy the compiled CSS and paste it over to your seedProject (replacing its predecessor)

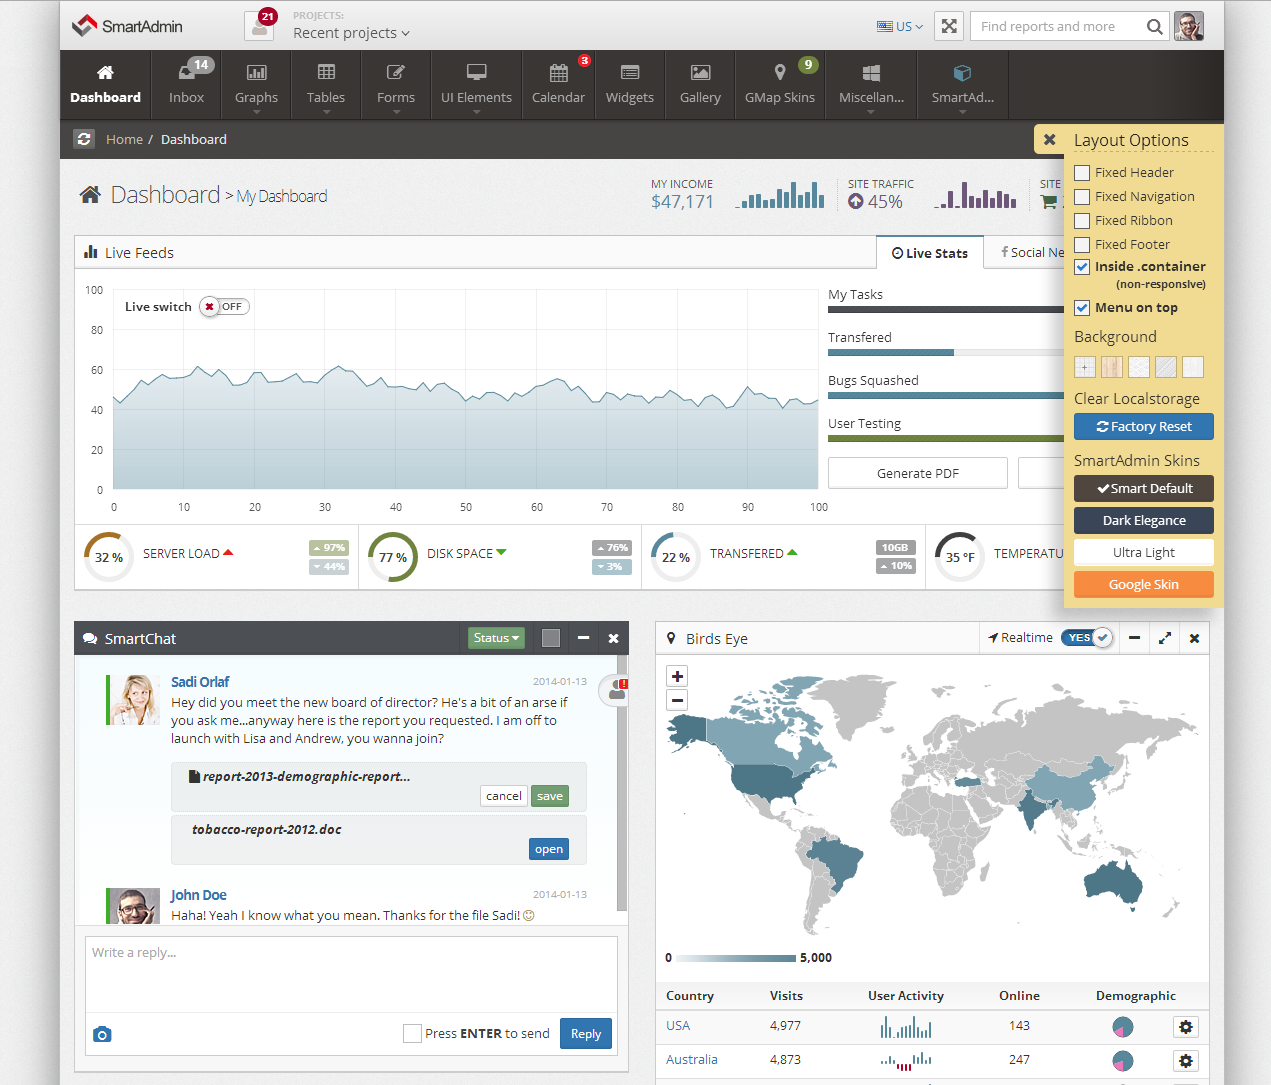
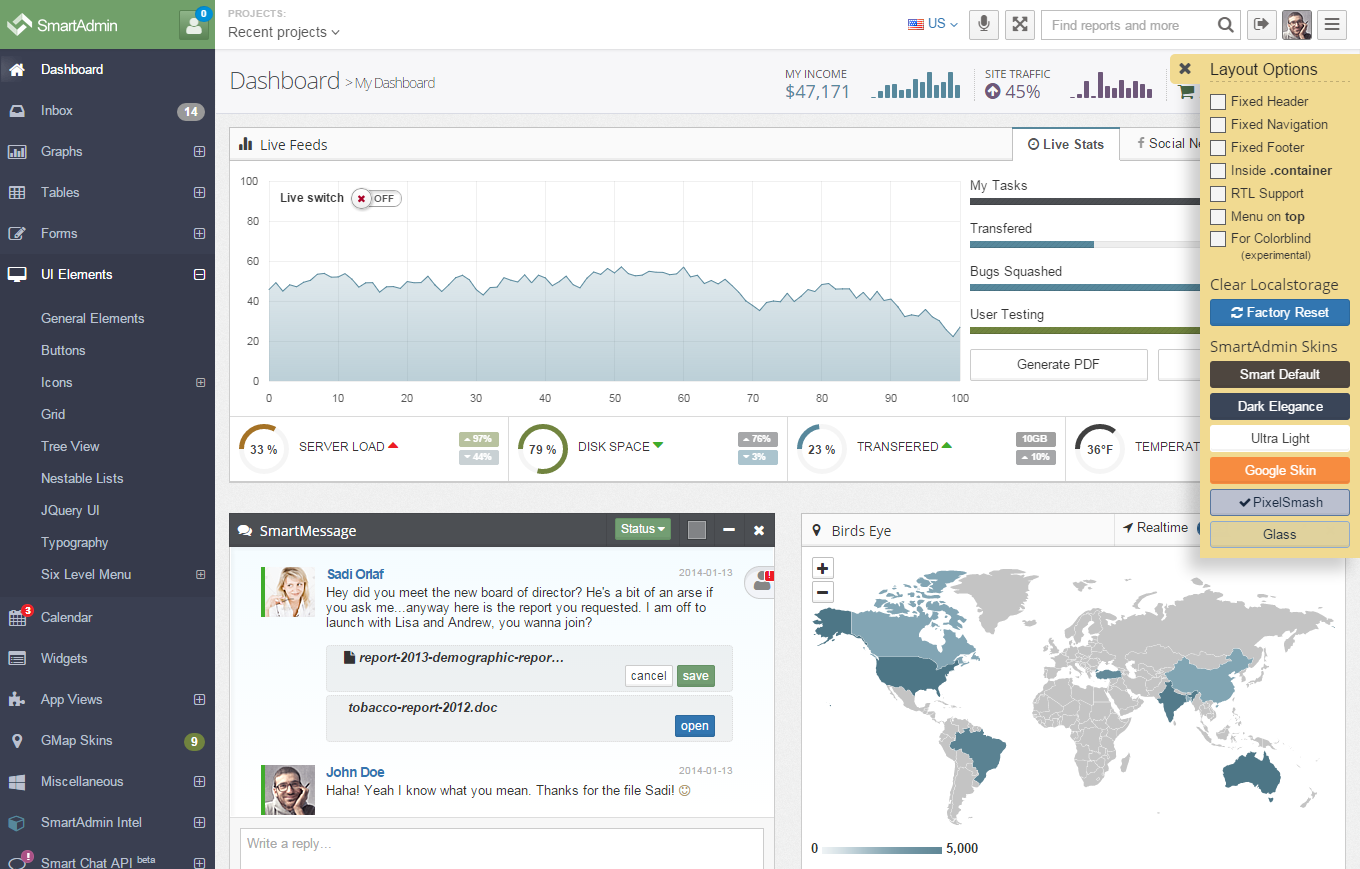
Layout API
Minified
Minifies the navigation so users can have more room for the content while still having access to the menu by hovering over the parent node icons. You can also control this by the minify data attribute. Please see the data-attributes section for more info on how this works.

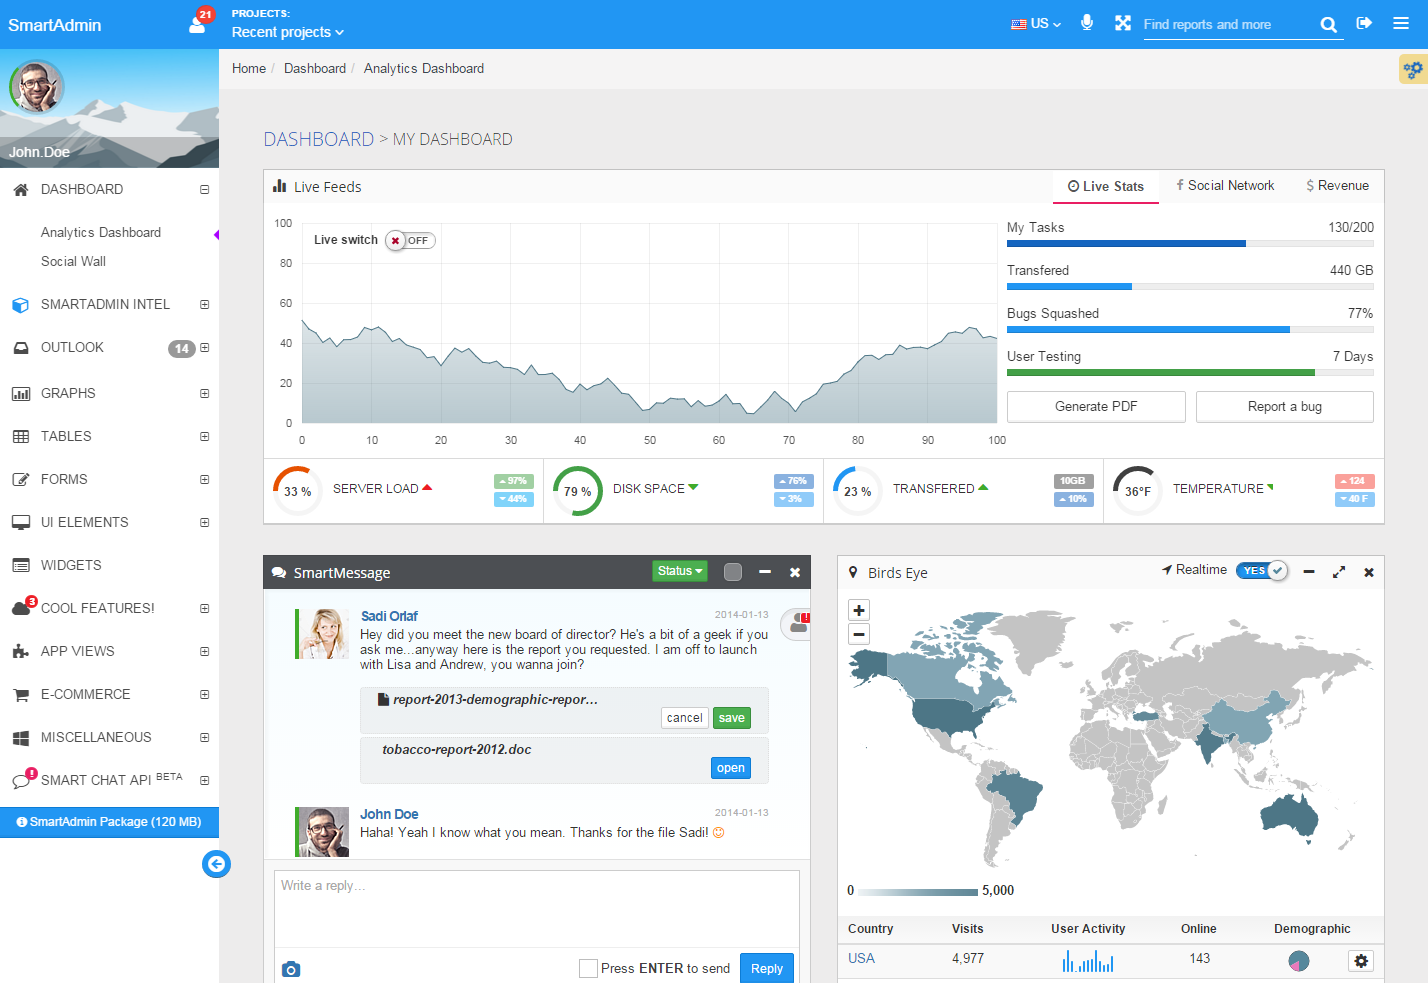
Hidden Menu

Fixed Header

Fixed Header

Fixed Navigation, Header and Ribbon (composite API)

Fixed width (inside container)

Menu on top
Remove your demo.js
It is generally a good idea to remove your demo.js file once you have a basic configuration set for your site. So unless you want your users to have full control of the layout, it is highly recommended to remove the demo.css/js files.
Page Script Structure
1 2 3 4 5 6 7 8 9 10 11 12 13 14 15 16 17 18 19 20 21 22 23 24 25 26 27 28 29 30 31 32 33 34 35 36 37 38 39 40 41 42 43 44 45 46 47 48 49 50 51 52 53 54 55 56 57 58 59 60 61 62 63 64 65 66 67 68 69 70 71 72 73 74 75 76 77 78 79 80 81 82 83 84 85 86 87 88 89 90 91 92 93 94 95 96 97 98 99 100 101 102 |
<!-- PACE LOADER - turn this on if you want ajax loading to show (caution: uses lots of memory on iDevices)--> <script data-pace-options='{ "restartOnRequestAfter": true }' src="js/plugin/pace/pace.min.js"></script> <!-- Link to Google CDN's jQuery + jQueryUI; fall back to local --> <script src="http://ajax.googleapis.com/ajax/libs/jquery/2.1.1/jquery.min.js"></script> <script> if (!window.jQuery) { document.write(<script src="js/libs/jquery-2.1.1.min.js"></script>'); } </script> <script src="http://ajax.googleapis.com/ajax/libs/jqueryui/1.10.3/jquery-ui.min.js"></script> <script> if (!window.jQuery.ui) { document.write(<script src="js/libs/jquery-ui-1.10.3.min.js"></script>'); } </script> <!-- IMPORTANT: APP CONFIG --> <script src="js/app.config.js"></script> <!-- JS TOUCH : include this plugin for mobile drag / drop touch events--> <script src="js/plugin/jquery-touch/jquery.ui.touch-punch.min.js"></script> <!-- BOOTSTRAP JS --> <script src="js/bootstrap/bootstrap.min.js"></script> <!-- CUSTOM NOTIFICATION --> <script src="js/notification/SmartNotification.min.js"></script> <!-- JARVIS WIDGETS --> <script src="js/smartwidgets/jarvis.widget.min.js"></script> <!-- EASY PIE CHARTS --> <script src="js/plugin/easy-pie-chart/jquery.easy-pie-chart.min.js"></script> <!-- SPARKLINES --> <script src="js/plugin/sparkline/jquery.sparkline.min.js"></script> <!-- JQUERY VALIDATE --> <script src="js/plugin/jquery-validate/jquery.validate.min.js"></script> <!-- JQUERY MASKED INPUT --> <script src="js/plugin/masked-input/jquery.maskedinput.min.js"></script> <!-- JQUERY SELECT2 INPUT --> <script src="js/plugin/select2/select2.min.js"></script> <!-- JQUERY UI + Bootstrap Slider --> <script src="js/plugin/bootstrap-slider/bootstrap-slider.min.js"></script> <!-- browser msie issue fix --> <script src="js/plugin/msie-fix/jquery.mb.browser.min.js"></script> <!-- FastClick: For mobile devices --> <script src="js/plugin/fastclick/fastclick.min.js"></script> <!--[if IE 8]> <h1>Your browser is out of date, please update your browser by going to www.microsoft.com/download</h1> <![endif]--> <!-- Demo purpose only --> <script src="js/demo.min.js"></script> <!-- MAIN APP JS FILE --> <script src="js/app.min.js"></script> <!-- ENHANCEMENT PLUGINS : NOT A REQUIREMENT --> <!-- Voice command : plugin --> <script src="js/speech/voicecommand.min.js"></script> <!-- SmartChat UI : plugin --> <script src="js/smart-chat-ui/smart.chat.ui.min.js"></script> <script src="js/smart-chat-ui/smart.chat.manager.min.js"></script> <!-- PAGE RELATED PLUGIN(S) <script src="..."></script>--> <script type="text/javascript"> $(document).ready(function() { /* DO NOT REMOVE : GLOBAL FUNCTIONS! */ pageSetUp(); }) </script> <!-- Your GOOGLE ANALYTICS CODE Below --> <script type="text/javascript"> var _gaq = _gaq || []; _gaq.push(['_setAccount', 'UA-XXXXXXXX-X']); _gaq.push(['_trackPageview']); (function() { var ga = document.createElement('script'); ga.type = 'text/javascript'; ga.async = true; ga.src = ('https:' == document.location.protocol ? 'https://ssl' : 'http://www') + '.google-analytics.com/ga.js'; var s = document.getElementsByTagName('script')[0]; s.parentNode.insertBefore(ga, s); })(); </script> |
Icons
FontAwesome Icon 4.x
Font Awesome gives you scalable vector icons that can instantly be customized — size, color, drop shadow, and anything that can be done with the power of CSS can be done to FontAwesome.
File dependency:
<link href="css/font-awesome.min.css" rel="stylesheet">
Also make sure that the FONTS folder is sitting in your root directory, if not you will have to manually edit the CSS or minified CSS file to point to the proper path.
For LESS and SASS versions click here
Inline Icons
Place Font Awesome icons just about anywhere using the <i> tag.
<i class="fa fa-camera-retro"></i> fa-camera-retro
Larger Icons
To increase icon sizes relative to their container, use the fa-lg (33% increase), fa-2x, fa-3x, fa-4x, or fa-5x classes.
<p><i class="fa fa-camera-retro fa-lg"></i> fa-camera-retro</p>
<p><i class="fa fa-camera-retro fa-2x"></i> fa-camera-retro</p>
<p><i class="fa fa-camera-retro fa-3x"></i> fa-camera-retro</p>
<p><i class="fa fa-camera-retro fa-4x"></i> fa-camera-retro</p>
<p><i class="fa fa-camera-retro fa-5x"></i> fa-camera-retro</p>
Fixed Width Icons
Use fa-fw to set icons at a fixed width. Great to use when variable icon widths throw off alignment. Especially useful in things like nav lists.
<ul class="nav nav-pills nav-stacked">
  <li class="active"><a href="#"><i class="fa fa-home fa-fw"></i> Home</a></li>
  <li><a href="#"><i class="fa fa-book fa-fw"></i> Library</a></li>
  <li><a href="#"><i class="fa fa-pencil fa-fw"></i> Applications</a></li>
  <li><a href="#"><i class="fa fa-cogs fa-fw"></i> Settings</a></li>
</ul>
For a full list of icons to use please go to the FontAwesome Library Website
Glyphicons
Includes 200 glyphs in font format from the Glyphicon Halflings set. Glyphicons Halflings are normally not available for free, but their creator has made them available for Bootstrap free of cost. As a thank you, we only ask that you to include a link back to Glyphicons whenever possible
CLICK HERE for proper usage

Forms
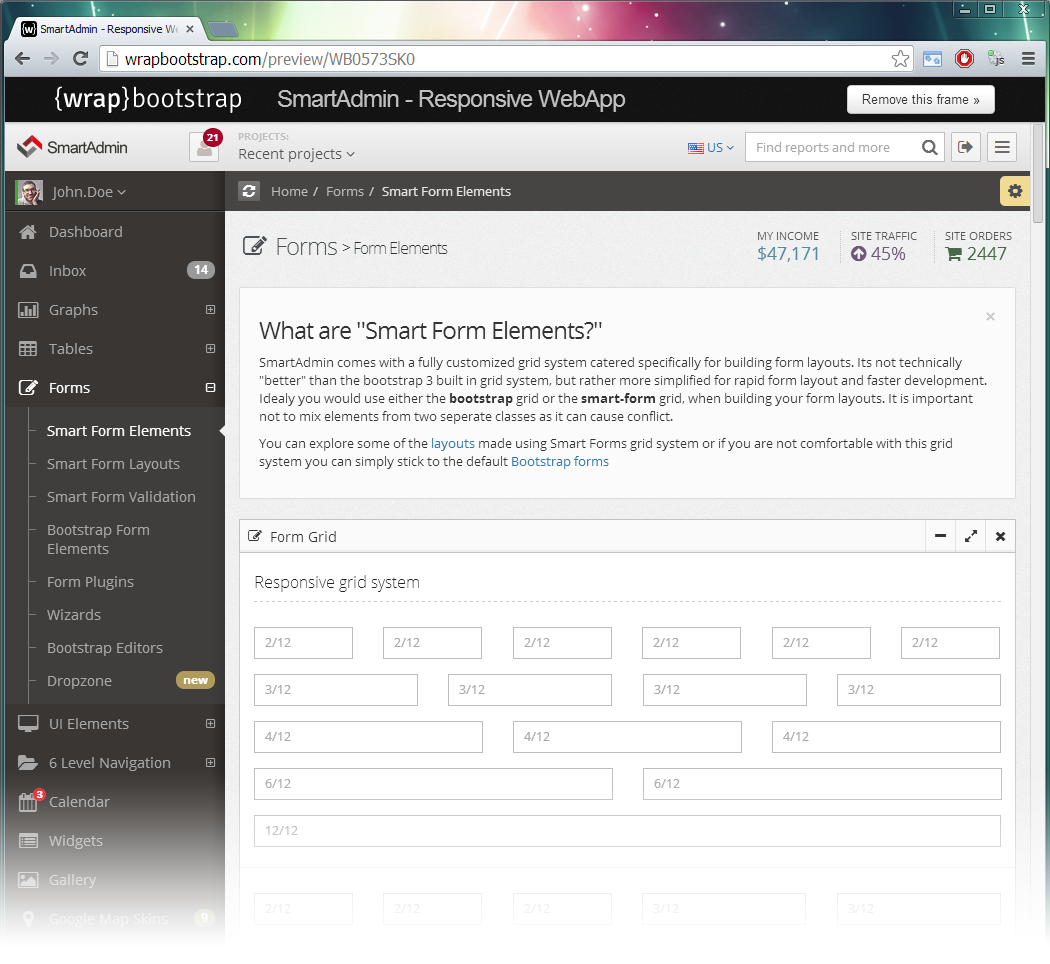
SmartAdmin comes with two types of form grids. SmartForms and the default Bootstrap Form grid. SmartForms comes with a fully customized grid system catered specifically for building form layouts. It is not technically "better" than the bootstrap 3 built-in grid system, but rather more simplified for rapid form layout and overall faster development.
When building your own form layouts, you should use either the Bootstrap or the SmartForm grid . It is important not to mix the two form grids as they can cause conflict.
SmartForm Layout
For SmartForm layouts and examples, please visit the "SmartForms" section of SmartAdmin (found under the Forms menu)
Bootstrap Form Layout
For the default bootstrap form layouts, please visit http://getbootstrap.com/css/#forms (you can visit the "Bootstrap Forms" section of SmartAdmin for further customized elements)

Plugins
SmartAdmin "Third Party Plugins"
SmartAdmin utilizes many third party plugins in order to synchronize with your needs. The following plugins are constantly evolving and changing. It can get quite difficult to keep up to date with bugs and new plugin releases. For your convenience I have included this plugin list, their homepages and their relevant support forum (where applicable).
Please note we do not provide support for extended plugins!
Bootstrap Multiselect
Bootstrap multiselect documentation
Bootstrap Progressbar
Bootstrap Progressbar documentation
Bootstrap Max Length
Bootstrap Max Length documentation
Bootstrap Slider
Bootstrap Slider documentation
Bootstrap Tagsinput
Bootstrap Tagsinput documentation
Bootstrap Timepicker
Bootstrap Timepicker documentation
Bootstrap Wizard
Bootstrap Wizard documentation
Bootstrap TREE

Bootstrap Colorpicker
Bootstrap Colorpicker documentation
CK Editor
CK Editor documentation
Datatables
Datatables documentation
Dropzone
Dropzone documentation
Easy Pie
Easy Pie documentation
Flot Charts
Flot Charts documentation
Fuel Ux Wizard
Fuel UX Wizard documentation
Full Calendar
Full Calendar documentation
Ion Range Slider
Ion Range Slider documentation
Jquery Form
Jquery Form documentation
Jquery Nestable
Jquery Nestable documentation
JQuery UI Touch Punch
Jquery UI Touch Punch documentation
Jquery Validate
Jquery Validate documentation
Knob
Knob documentation
Markdown
Markdown documentation
Masked Input
Masked input documentation
Morris Charts
Morris Charts documentation
$.noUiSlider
noUISlider documentation
Pace.js
Pace.js documentation
Select2
Select2 documentation
SelectToUISlider
SelectToUISlider documentation
Summernote
Summernote documentation
Sparkline
Sparkline documentation
Superbox
Superbox documentation
TypeHead
TypeHead documentation
Vectormap
Vectormap documentation
Xeditable
Xeditable documentation
Charts
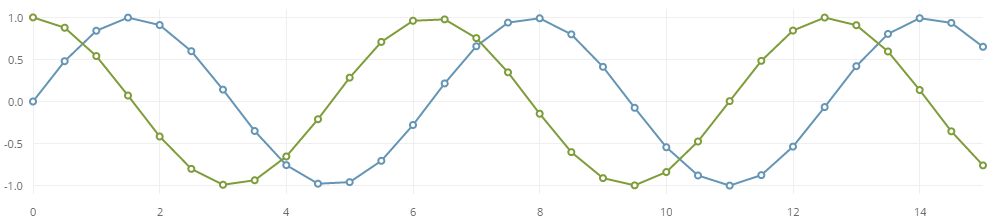
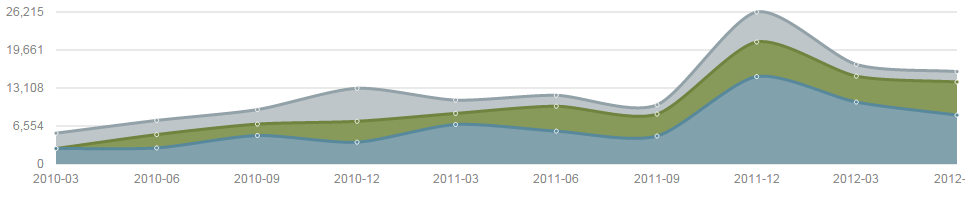
Flot Charts
Flot is a pure JavaScript plotting library for jQuery, with a focus on simple usage, attractive looks and interactive features. FlotChart works with Internet Explorer 6+, Chrome, Firefox 2+, Safari 3+ and Opera 9.5+
Basic Usage
Create a placeholder div to put the graph in:
<div id="placeholder"></div>
You need to set the width and height of this div, otherwise the plot library doesn't know how to scale the graph. You can do it inline like this:
<div id="placeholder" style="width:600px;height:300px"></div>
You can also do it using an external stylesheet. Make sure that the placeholder isn't within something with a display:none CSS property - in that case, Flot has trouble measuring label dimensions which results in garbled looks and might have trouble measuring the placeholder dimensions which is fatal (it'll throw an exception).
$.plot($("#placeholder"), data, options);
In this example, data is an array of vectors and options is an object with settings if you want to customize the plot.
Take a look at the following examples for some ideas of what to use; or look at the API reference. Here's a quick example that'll draw a line from (0, 0) to (1, 1):
$.plot($("#placeholder"), [ [[0, 0], [1, 1]] ], { yaxis: { max: 1 } });
For more info on FLOTCHART:
Morris Charts
PLEASE NOTE: Morris Charts are NOT responsive!
<link rel="stylesheet" href="http://cdn.oesmith.co.uk/morris-0.4.3.min.css">
<script src="//ajax.googleapis.com/ajax/libs/jquery/1.9.0/jquery.min.js"></script>
<script src="//cdnjs.cloudflare.com/ajax/libs/raphael/2.1.0/raphael-min.js"></script>
<script src="http://cdn.oesmith.co.uk/morris-0.4.3.min.js"></script>
Example Chart
Start by adding a <div> to your page that will contain your chart. Make sure it has an id attribute, since you need this to refer to it in your script later on.
<div id="myfirstchart" style="height: 250px;"></div>
Note: in order to display anything, you need to give the div dimensions. Here I’ve used inline CSS just for illustration purposes.
Next add a <script> block to the end of your page, containing the following javascript code:
new Morris.Line({
  // ID of the element in which to draw the chart.
  element: 'myfirstchart',
  // Chart data records -- each entry in this array corresponds to a point on
  // the chart.
  data: [
    { year: '2011', value: 20 },
    { year: '2012', value: 10 },
    { year: '2013', value: 5 },
    { year: '2014', value: 5 },
    { year: '2015', value: 20 }
  ],
  // The name of the data record attribute that contains x-values.
  xkey: 'year',
  // A list of names of data record attributes that contain y-values.
  ykeys: ['value'],
  // Labels for the ykeys -- will be displayed when you hover over the
  // chart.
  labels: ['Value']
});
Chart.js
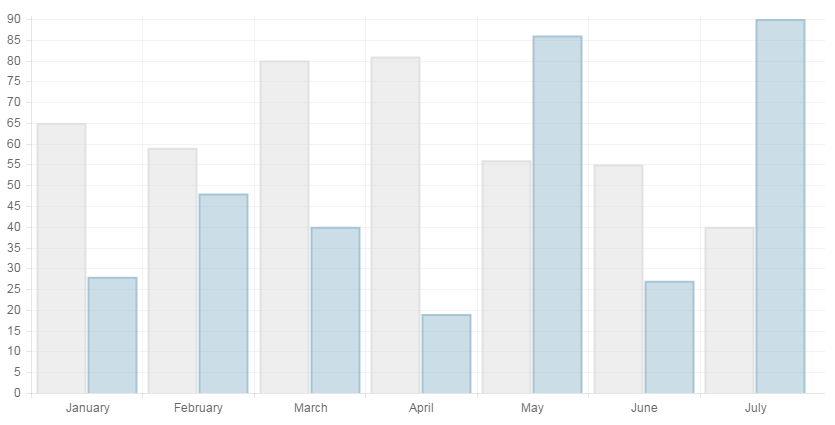
    labels: ["January", "February", "March", "April", "May", "June", "July"],
    datasets: [
        {
            label: "My First dataset",
            fillColor: "rgba(220,220,220,0.5)",
            strokeColor: "rgba(220,220,220,0.8)",
            highlightFill: "rgba(220,220,220,0.75)",
            highlightStroke: "rgba(220,220,220,1)",
            data: [65, 59, 80, 81, 56, 55, 40]
        },
        {
            label: "My Second dataset",
            fillColor: "rgba(151,187,205,0.5)",
            strokeColor: "rgba(151,187,205,0.8)",
            highlightFill: "rgba(151,187,205,0.75)",
            highlightStroke: "rgba(151,187,205,1)",
            data: [28, 48, 40, 19, 86, 27, 90]
        }
    ]
};
Dygraphs
Dygraphs is a fast, flexible open source JavaScript charting library. Some of its key features include:
- Handles huge data sets: dygraphs plots millions of points without getting bogged down.
- Interactive out of the box: zoom, pan and mouseover are on by default.
- Strong support for error bars / confidence intervals.
- Highly customizable: using options and custom callbacks, you can make dygraphs do almost anything.
- dygraphs is highly compatible: it works in all major browsers (including IE8). You can even pinch to zoom on mobile/tablet devices!
- There's an active community developing and supporting dygraphs.

Statistic Elements
Easy Pie Charts

<div class="easy-pie-chart txt-color-greenLight easyPieChart"
data-percent="50"
data-pie-size="50"
data-size="180">
    <span>
       55
    </span>
</div>
Sparkline Pie
<div class="sparkline txt-color-blue display-inline"
data-sparkline-offset="90"
data-sparkline-piesize="75px"
data-sparkline-type="pie"
data-sparkline-piecolor="['#E979BB', '#57889C']">
    3,5,2
</div>
Sparkline Composite
<div class="sparkline"
data-sparkline-bar-val="[4,1,5,7,9,9,8,7,6,6,4,7,8,4,3,2,2,5,6,7]"
data-sparkline-color-bottom="#2b5c59"
data-sparkline-color-top="#3a6965"
data-sparkline-height="78px"
data-sparkline-highlightline-color-top="#cce8e4"
data-sparkline-highlightspot-color-top="#9dbdb9"
data-sparkline-line-val="[6,4,7,8,4,3,2,2,5,6,7,4,1,5,7,9,9,8,7,6]"
data-sparkline-line-width-top="3"
data-sparkline-maxspot-color-top="#c2cccc"
data-sparkline-minspot-color-top="#97bfbf"
data-sparkline-spot-color="#2b5c59"
data-sparkline-spotradius-top="5"
data-sparkline-type="compositeline"
data-sparkline-width="96%"></div>
Sparkline Bar Chart
<div class="sparkline txt-color-blueLight text-center"
data-sparkline-barspacing="5"
data-sparkline-barwidth="11"
data-sparkline-height="80px"
data-sparkline-type="bar"
data-sparkline-width="96%">
    4,3,5,7,9,9,8,7,6,6,4,7,8,4
</div>
UI Elements
General Elements
Alerts

1 2 3 4 |
<div class="alert alert-warning fade in"> <button class="close" data-dismiss="alert">×</button> <strong>Warning</strong> Your monthly traffic is reaching limit. </div> |
Progressbars (please see the General Elements page for more examples)

1 2 3 |
<div class="progress progress-sm"> <div class="progress-bar bg-color-greenLight" style="width: 40%"></div> </div> |
The following classes can be used ".progress-micro", ".progress-xs", ".progress-sm", ".progress-lg"
Tabs (please view the tabs section in General Elements page for more examples)

1 2 3 4 5 6 7 8 9 10 11 12 13 14 15 16 17 18 19 20 21 22 23 24 25 26 27 28 29 30 31 32 33 34 |
<ul class="nav nav-tabs bordered" id="myTab1"> <li class="active"><a data-toggle="tab" href="#s1">Left Tab <span class="badge bg-color-blue txt-color-white">12</span></a></li> <li><a data-toggle="tab" href="#s2">Tab Item 2</a></li> <li class="dropdown"> <a class="dropdown-toggle" data-toggle="dropdown" href="javascript:void(0);">Dropdown</a> <ul class="dropdown-menu"> <li><a data-toggle="tab" href="#s3">@fat</a></li> <li><a data-toggle="tab" href="#s4">@mdo</a></li> </ul> </li> <li class="pull-right"> [SPARKLINE_GRAPH] </li> </ul> <div class="tab-content padding-10" id="myTabContent1"> <div class="tab-pane fade in active" id="s1"> [TAB_CONTENT_1] </div> <div class="tab-pane fade" id="s2"> [TAB_CONTENT_2] </div> <div class="tab-pane fade" id="s3"> [TAB_CONTENT_3a] </div> <div class="tab-pane fade" id="s4"> [TAB_CONTENT_3b] </div> </div> |
Accordions

Buttons

Tables
SmartAdmin uses the default table CSS from the core bootstrap CSS file. For more information please visit: http://getbootstrap.com/css/#tables

Datatables
UPDATE: SmartAdmin have upgraded datatable to version
SmartAdmin uses the plugin "datatables" for dynamic table content and table data alterations. More info about this plugin can be found on datatables.net.

jqGrid
- Works fine under IE, Firefox, Chrome, Safari, Opera
- The UI comes in 20+ languages
- In-place cell editing or on-the-fly form creation to edit a record
- Supports subgrids and tree grid for displaying hierarchical data
- AJAX enabled - Accepts XML/JSON/local array data sources
- Paging, sorting, Search and filtering
Find plugin information and demos on: http://trirand.com/blog/jqgrid/jqgrid.html

Smart Widgets
The all new and revolutionary JarvisWidgets v2.0 ($35 value) is now exclusive to SmartAdmin. JarvisWidgets allows you to do more than your normal average widgets. You can use realtime AJAX loading in a snap with auto refresh. Add Infinite buttons and controls to the widget header. All widgets are sortable across all bootstrap col-spans and use HTML5 localStorage for its properties such as the title. It also provides RTL Support, Crossbrowser Support, Callback functions and much more!
1 2 3 4 5 6 7 8 9 10 11 12 13 14 15 16 17 18 19 20 21 22 23 24 25 26 27 28 29 30 31 32 33 34 35 36 37 38 39 40 41 42 43 44 45 46 47 48 49 50 51 52 53 54 55 56 57 58 59 60 61 62 63 64 65 66 67 68 69 70 71 72 73 74 75 76 77 78 79 80 81 82 83 |
/* * INITIALIZE JARVIS WIDGETS * Setup Desktop Widgets */ function setup_widgets_desktop() { if ($.fn.jarvisWidgets && enableJarvisWidgets) { $('#widget-grid').jarvisWidgets({ grid: 'article', widgets: '.jarviswidget', localStorage: localStorageJarvisWidgets, deleteSettingsKey: '#deletesettingskey-options', settingsKeyLabel: 'Reset settings?', deletePositionKey: '#deletepositionkey-options', positionKeyLabel: 'Reset position?', sortable: sortableJarvisWidgets, buttonsHidden: false, // toggle button toggleButton: true, toggleClass: 'fa fa-minus | fa fa-plus', toggleSpeed: 200, onToggle: function () {}, // delete btn deleteButton: true, deleteMsg: 'Warning: This action cannot be undone!', deleteClass: 'fa fa-times', deleteSpeed: 200, onDelete: function () {}, // edit btn editButton: true, editPlaceholder: '.jarviswidget-editbox', editClass: 'fa fa-cog | fa fa-save', editSpeed: 200, onEdit: function () {}, // color button colorButton: true, // full screen fullscreenButton: true, fullscreenClass: 'fa fa-expand | fa fa-compress', fullscreenDiff: 3, onFullscreen: function () {}, // custom btn customButton: false, customClass: 'folder-10 | next-10', customStart: function () { alert('Hello you, this is a custom button...'); }, customEnd: function () { alert('bye, till next time...'); }, // order buttonOrder: '%refresh% %custom% %edit% %toggle% %fullscreen% %delete%', opacity: 1.0, dragHandle: '> header', placeholderClass: 'jarviswidget-placeholder', indicator: true, indicatorTime: 600, ajax: true, timestampPlaceholder: '.jarviswidget-timestamp', timestampFormat: 'Last update: %m%/%d%/%y% %h%:%i%:%s%', refreshButton: true, refreshButtonClass: 'fa fa-refresh', labelError: 'Sorry but there was a error:', labelUpdated: 'Last Update:', labelRefresh: 'Refresh', labelDelete: 'Delete widget:', afterLoad: function () {}, rtl: false, // best not to toggle this! onChange: function () { }, onSave: function () { }, ajaxnav: $.navAsAjax // declears how the localstorage should be saved (HTML or AJAX Version) }); } } |
Notice the custom icon classes, we add the | to separate each toggle state for the icon. You can change any of the icons using the fontawesome library classes. Please be mindful of the icon size as it will break the layout when you use classes such as ".fa-2x".
Widget Structure
All widgets must be placed inside the #widget-grid container followed by <article>[your_widgets]</article>
Example layout structure (this should be inside the #content container )
Example below is a Single grid layout:
1 2 3 4 5 6 7 8 9 10 11 |
    <section id="widget-grid">
        <!-- row -->
        <div class="row">
            <!-- SINGLE GRID -->
            <article class="col-xs-12 col-sm-12 col-md-12 col-lg-12">

                [YOUR_WIDGET_#1]

            </article><!-- GRID END -->
        </div><!-- end row -->
    </section>
|
Example below is a Multiple grid layout:
1 2 3 4 5 6 7 8 9 10 11 12 13 14 15 16 17 18 19 20 21 22 23 24 25 26 |
    <section id="widget-grid">

        <!-- row -->

        <div class="row">
            <!-- SINGLE GRID -->
            <article class="col-xs-12 col-sm-6 col-md-6 col-lg-6">

                [YOUR_WIDGET_#1]

                [YOUR_WIDGET_#2]

            </article><!-- END GRID -->

            <!-- SINGLE GRID -->
            <article class="col-xs-12 col-sm-6 col-md-6 col-lg-6">

                [YOUR_WIDGET_#3]

                [YOUR_WIDGET_#4]

            </article><!-- END GRID -->

        </div><!-- end row -->

    </section><!-- end widget grid -->
|
Widget layout
Caution: ID of the widget does not control where the widget should be on the page rather it works as an identifier for the localStorage. If you wish to rearrange the widget with hard code make sure to clear the localStorage and hit refresh to see the new arrangement
1 2 3 4 5 6 7 8 9 10 11 12 13 14 15 16 17 18 19 20 21 |
    <div class="jarviswidget" id="wid-id-0">

        <header>
            <h2>Widget Title</h2>
        </header><!-- widget div-->

        <div>
            <!-- widget edit box -->
            <div class="jarviswidget-editbox">
                <!-- This area used as dropdown edit box -->
                <input class="form-control" type="text">
            </div><!-- end widget edit box -->

            <!-- widget content -->
            <div class="widget-body">

                [PLACE WIDGET CONTENTS HERE]

            </div><!-- end widget content -->
        </div><!-- end widget div -->
    </div><!-- end widget -->
|
Widget Controls
| HTML5 data attributes / CSS / HTML | Place after | Example value(s) | Desctription |
|---|---|---|---|
|
These HTML5 attributes are used as individual widget options. Main options can be changed in the widgets plugin it self. Notice: data attributes can only have 1 boolan value(see above)!
|
|||
| data-widget-sortable |
header |
false | Prevent a widget from being sortable (can only be used with the value 'false'). |
| data-widget-icon |
.jarviswidget |
fa fa-trash | Use a icon in the widgets header (see icons section for all list of icons). |
| data-widget-togglebutton |
.jarviswidget |
false | Prevent a widget from having a toggle button (can only be used with the value 'false'). |
| data-widget-deletebutton |
.jarviswidget |
false | Prevent a widget from having a delete button (can only be used with the value 'false'). |
| data-widget-editbutton |
.jarviswidget |
false | Prevent a widget from having a edit button (can only be used with the value 'false'). |
| data-widget-fullscreenbutton |
.jarviswidget |
false | Prevent a widget from having a fullscreen button (can only be used with the value 'false'). |
| data-widget-load |
.jarviswidget |
widget-ajax.php | The file that is loaded with ajax. |
| data-widget-refresh |
.jarviswidget |
10 | Seconds to refresh a ajax file (see 'data-widget-load'). |
| data-widget-refreshbutton |
.jarviswidget |
false | Prevent a ajax widget from showing a refresh button (can only be used with the value 'false'). |
| data-widget-hidden |
.jarviswidget |
true | Hide a widget at load (can only be used with the value 'true'). |
| data-widget-colorbutton |
.jarviswidget |
false | This is active by default, set it to false to hide. |
| data-widget-collapsed |
.jarviswidget |
false | Collapse a widget upon load (can only be used with the value 'true'). This will allways be collapsed every page load. |
| data-widget-grid |
article |
false | You can exclude grids from being a sortable/droppable area, this means that all widgets in this area will work, but cant be sortable/droppable and that all other widgets cant be dropped in this area. Add this attribute (can only be used with the value 'false') to a grid element. |
.no-padding |
.widget-body |
n/a | Removes all padding inside widget body |
.well |
.jarviswidget |
n/a | Converts a widget to a well |
You will see lots more example if you visit the Smart Widgets page from the SmartAdmin menu:
Intro to App.config.js
Don't be afraid to dig into app.config.js!!
I know a lot of you are afraid to dig in and change variables and move codes around. I have designed app.config.js to be very user friendly, left helpful comments, hints and notes - please feel free to dig around. :)
-
APP CONFIGURATION [ app.config.js ]
-
APP DOM REFERENCES [ app.config.js ]
-
DETECT MOBILE DEVICES [line: 149 ]
-
CUSTOM MENU PLUGIN [line: 688 ]
-
ELEMENT EXIST OR NOT [line: 778
-
INITIALIZE FORMS [line: 788 ]
-
BOOTSTRAP SLIDER PLUGIN [line: 794 ]
-
SELECT2 PLUGIN [line: 803 ]
-
MASKING [line: 824 ]
-
AUTOCOMPLETE [line: 843 ]
-
JQUERY UI DATE [line: 862 ]
-
AJAX BUTTON LOADING TEXT [line: 884 ]
-
INITIALIZE CHARTS [line: 902 ]
-
SPARKLINES [line: 907 ]
-
LINE CHART [line: 1026]
-
PIE CHART [line: 1077]
-
BOX PLOT [line: 1100]
-
BULLET [line: 1145]
-
DISCRETE [line: 1169]
-
TRISTATE [line: 1195]
-
COMPOSITE: BAR [line: 1223]
-
COMPOSITE: LINE [line: 1259]
-
EASY PIE CHARTS [line: 1339]
-
INITIALIZE JARVIS WIDGETS [line: 1379]
-
SETUP DESKTOP WIDGET [line: 1466]
-
GOOGLE MAPS [line: 1478]
-
LOAD SCRIPTS [line: 1500]
-
APP AJAX REQUEST SETUP [line: 1538]
-
CHECK TO SEE IF URL EXISTS [line: 1614]
-
LOAD AJAX PAGES [line: 1669]
-
UPDATE BREADCRUMB [line: 1775]
-
PAGE SETUP [line: 1798]
-
POP OVER THEORY [line: 1852]
1 2 3 4 5 6 7 8 9 10 11 12 13 14 15 16 17 18 19 20 21 22 23 24 25 26 27 28 29 30 31 32 33 34 35 36 37 38 39 40 41 42 43 44 45 46 47 48 49 50 51 52 53 54 55 |
/* * PAGE SETUP * Description: fire certain scripts that run through the page * to check for form elements, tooltip activation, popovers, etc... */ function pageSetUp() { if (thisDevice === "desktop") { // is desktop // activate tooltips $("[rel=tooltip], [data-rel=tooltip]").tooltip(); // activate popovers $("[rel=popover], [data-rel=popover]").popover(); // activate popovers with hover states $("[rel=popover-hover], [data-rel=popover-hover]").popover({ trigger: "hover" }); // setup widgets setup_widgets_desktop(); // activate inline charts runAllCharts(); // run form elements runAllForms(); } else { // is mobile // activate popovers $("[rel=popover], [data-rel=popover]").popover(); // activate popovers with hover states $("[rel=popover-hover], [data-rel=popover-hover]").popover({ trigger: "hover" }); // activate inline charts runAllCharts(); // setup widgets setup_widgets_mobile(); // run form elements runAllForms(); } } /* ~ END: PAGE SETUP */ |
LESS Files
You will find the SmartAdmin LESS files under the Source_LESS_FILES folder located inside the Developer Folder.
Compile Instructions
Download link: http://alphapixels.com/prepros/
SASS FILES
SmartAdmin introduced SASS files with version 1.4.1. All SASS files were contributed by Juha Kela <juha.kela@ltronic.fi> and were configured to Compass by Alexandre Azevedo <alexndreazevedo@gmail.com>
You can make your own contributions by emailing support@myorange.ca.
You will find the SASS files inside the Source_SASS_FILES folder:

Landing page
You requested it, we made it!
SmartAdmin 1.5 contains the all new Landing Page template! This easy-to-use and navigate layout provides you with a sleek and crisp way to introduce your targetted audience with your product or service. They'll love it!
Fully customizable and configurable, using the basic framework you all know and trust. This single page presentation will surely leave your vistors wanting for more.

The following pages are available within the landing page layout:
- Search - Quick access to present anything relevant to the input query
- Pricing - A great way to present your services and/or products, and highlight payment plans
- Team - Use this page to quickly introduce the team behind your company, a familiar face helps to do business
- Features - Key highlights of your services and their strengths, quickly let your potential customers know why choosing you is the best choice to make
- Screenshots - Reading is but half the battle, let them see what they might be getting and how it will change their lives forever
- Updates - Use this timeline oriented feature to show your roadmap or your launch event
- Contact - By now they are sold for sure, so give them the information they need and do business today!
SmartAdmin Skins
Smart Default
<body class="smart-style-0">...</body>

Dark Elegance
<body class="smart-style-1">...</body>

Ultra White
<body class="smart-style-2">...</body>

Google Skin (google analytics)
<body class="smart-style-3">...</body>

PixelSmash
<body class="smart-style-4">...</body>
Glass
<body class="smart-style-5">...</body>
Recently introduced with version 1.5. This theme is still in beta, there might still be a few elements that need to be re-touched but overall this theme allows you to customize the backdrop and create a whole new experience!

Material Design (beta)
<body class="smart-style-6">...</body>
Due to popularity of the Material Design concept presented by google, we have successfully mimicked the design and created skin for SmartAdmin with Material Design concepts (https://www.google.com/design/spec/material-design/introduction.html)
RTL CSS
RTL support has been a long outstanding request from the SmartAdmin community and with version 1.5 we were finally able to make the necessary push to enable complete support for this much coveted reading mode.
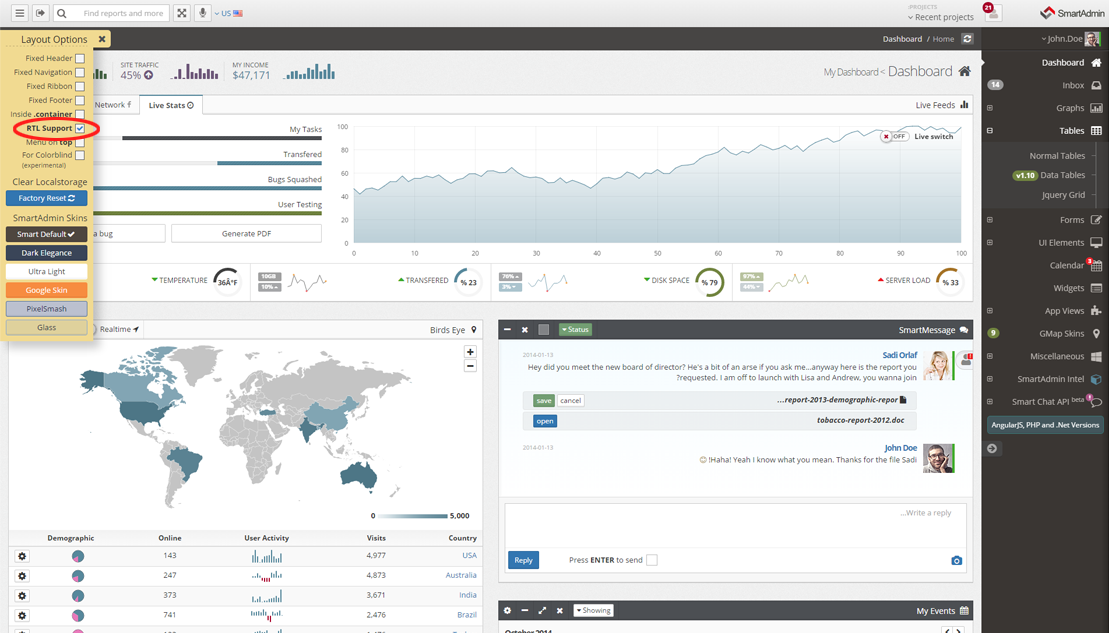
All aspects of the template will be switched over to RTL mode, however since the template itself is still English, enabling RTL will generally not make much sense until you add a RTL enabled language to the site.
To enable the RTL feature manually, make sure you include the file smartadmin-rtl.min.css to your project and add the class "smart-rtl" to your <body> tag
Data-attributes
With SmartAdmin comes data-attribute support for quick to use configuration and setting options. To use any of these, just insert the following "data-action=[action_name]" to any HTML element in order to utilize the desired function.
| data-action="userLogout" |
Logout message popup, use it with data-logout-msg = "..." |
| data-action="resetWidgets" | Resets all localStorage (restores all app settings and widgets) |
| data-action="launchFullscreen" | Launch full screen view (works only in Chrome, Safari, Firefox and Latest IE) |
| data-action="minifyMenu" | Minify main nav (works only with vertical menu case) |
| data-action="toggleMenu" | Collapse left menu (but still accessable by hovering left edge of screen) |
| data-action="toggleShortcut" | Top slidedown / Metro menu toggle |
Animation.css
SmartAdmin has a built in animation core system (built by Danial Eden), it uses the "animation.less" file to generate almost all kinds of animations which can be applied to various HTML objects within your project by simply adding classes to the container element of choice.
Proper Usage:
Speed up the animation by adding the class "fast", for example...
List of possible animation types:
Attention Seekers
- bounce
- flash
- pulse
- shake
- swing
- tada
- wobble
Bouncing Entrances
- bounceIn
- bounceInDown
- bounceInLeft
- bounceInRight
- bounceInUp
Bouncing Exists
- bounceOut
- bounceOutDown
- bounceOutRight
- bounceOutUp
- fadeIn
- fadeInDown
- fadeInDownBig
- fadeInLeft
- fadeInRight
- fadeInRightBig
- fadeInUp
- fadeInUpBig
- fadeOut
- fadeOutDown
- fadeOutDownBig
- fadeOutLeft
- fadeOutLeftBig
- fadeOutRight
- fadeOutRightBig
- fadeOutUp
- fadeOutUpBig
- flip
- flipInX
- flipInY
- flipOutX
- flipOutY
- lightSpeedIn
- lightSpeedOut
- rotateIn
- rotateInDownLeft
- rotateInDownRight
- rotateUpLeft
- rotateInUpRight
- rotateOut
- rotateOutDownLeft
- rotateOutDownRight
- rotateOutUpLeft
- rotateOutUpRight
- slideInDown
- slideInLeft
- slideInRight
- slideOutLeft
- slideOutRight
- slideOutUp
- hinge
- rollIn
- rollOut
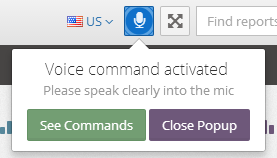
Voice Command
Introducing: Voice Command 1.1
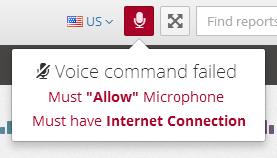

As a security precaution, your browser will disconnect the microphone every 60 to 120 seconds (sooner if not being used). In which case Voice Command will prompt you again to "Allow" or "Deny" access to your microphone.
Voice Command Shortcuts:
- 'show' then say the *page* you want to go to. For example "show inbox" or "show calendar"
- 'mute' - mutes all sound effects for the theme.
- 'sound on' - unmutes all sound effects for the theme.
- 'stop' - deactivates voice command.
- 'help' - brings up the command list
- 'got it' - closes help modal
- 'hide navigation' - toggle navigation collapse
- 'show navigation' - toggle navigation to open (can be used again to close)
- 'scroll up' - scrolls to the top of the page
- 'scroll down' - scrollts to the bottom of the page
- 'go back' - goes back in history (history -1 click)
- 'logout' - logs you out
Adding your own voice command:
Adding your own custom commands is extreamly simple. Voice Command supports over 50 languages (please see app.config.js file for the list of supporting languages and all commands)
A sample command could look like this:
1 2 3 4 5 6 7 8 9 10 11 12 13 14 15 16 17 18 19 20 21 22 23 24 25 26 27 28 29 30 31 32 33 34 35 36 37 38 39 40 41 42 43 44 45 46 47 48 49 50 51 52 53 54 55 56 57 58 59 60 61 62 63 64 65 66 67 68 69 70 71 72 73 74 75 76 77 78 79 80 81 82 83 84 85 86 87 88 89 90 91 92 93 94 95 96 97 98 99 100 101 102 103 104 105 106 107 108 109 110 111 112 113 114 115 116 117 118 119 120 121 122 123 124 125 126 127 128 129 130 131 132 133 134 135 136 137 138 139 140 141 142 143 144 145 146 147 148 149 150 151 152 153 154 155 156 157 158 159 160 161 162 163 164 165 166 167 168 169 170 171 172 173 174 175 176 177 178 179 180 181 182 183 184 185 186 187 188 189 190 191 192 193 194 195 196 197 198 199 |
/* * VOICE COMMAND CONFIG * dependency: js/speech/voicecommand.js */ voice_command = true, /* * Turns on speech as soon as the page is loaded */ voice_command_auto = false, /* * Sets the language to the default 'en-US'. (supports over 50 languages * by google) * * Afrikaans ['af-ZA'] * Bahasa Indonesia ['id-ID'] * Bahasa Melayu ['ms-MY'] * Català ['ca-ES'] * Čeština ['cs-CZ'] * Deutsch ['de-DE'] * English ['en-AU', 'Australia'] * ['en-CA', 'Canada'] * ['en-IN', 'India'] * ['en-NZ', 'New Zealand'] * ['en-ZA', 'South Africa'] * ['en-GB', 'United Kingdom'] * ['en-US', 'United States'] * Español ['es-AR', 'Argentina'] * ['es-BO', 'Bolivia'] * ['es-CL', 'Chile'] * ['es-CO', 'Colombia'] * ['es-CR', 'Costa Rica'] * ['es-EC', 'Ecuador'] * ['es-SV', 'El Salvador'] * ['es-ES', 'España'] * ['es-US', 'Estados Unidos'] * ['es-GT', 'Guatemala'] * ['es-HN', 'Honduras'] * ['es-MX', 'México'] * ['es-NI', 'Nicaragua'] * ['es-PA', 'Panamá'] * ['es-PY', 'Paraguay'] * ['es-PE', 'Perú'] * ['es-PR', 'Puerto Rico'] * ['es-DO', 'República Dominicana'] * ['es-UY', 'Uruguay'] * ['es-VE', 'Venezuela'] * Euskara ['eu-ES'] * Français ['fr-FR'] * Galego ['gl-ES'] * Hrvatski ['hr_HR'] * IsiZulu ['zu-ZA'] * Íslenska ['is-IS'] * Italiano ['it-IT', 'Italia'] * ['it-CH', 'Svizzera'] * Magyar ['hu-HU'] * Nederlands ['nl-NL'] * Norsk bokmål ['nb-NO'] * Polski ['pl-PL'] * Português ['pt-BR', 'Brasil'] * ['pt-PT', 'Portugal'] * Română ['ro-RO'] * Slovenčina ['sk-SK'] * Suomi ['fi-FI'] * Svenska ['sv-SE'] * Türkçe ['tr-TR'] * български ['bg-BG'] * Pусский ['ru-RU'] * Српски ['sr-RS'] * 한국어 ['ko-KR'] * 中文 ['cmn-Hans-CN', '普通话 (中国大陆)'] * ['cmn-Hans-HK', '普通话 (香港)'] * ['cmn-Hant-TW', '中文 (台灣)'] * ['yue-Hant-HK', '粵語 (香港)'] * 日本語 ['ja-JP'] * Lingua latīna ['la'] */ voice_command_lang = 'en-US', /* * Use localstorage to remember on/off (best used with HTML Version * when going from one page to the next) */ voice_localStorage = false; /* * Voice Commands * Defines voice command variables and functions */ if (voice_command) { var commands = { 'show dashboard' : function() { $('nav a[href="ajax/dashboard.html"]').trigger("click"); }, 'show inbox' : function() { $('nav a[href="ajax/inbox.html"]').trigger("click"); }, 'show graphs' : function() { $('nav a[href="ajax/flot.html"]').trigger("click"); }, 'show flotchart' : function() { $('nav a[href="ajax/flot.html"]').trigger("click"); }, 'show morris chart' : function() { $('nav a[href="ajax/morris.html"]').trigger("click"); }, 'show inline chart' : function() { $('nav a[href="ajax/inline-charts.html"]').trigger("click"); }, 'show dygraphs' : function() { $('nav a[href="ajax/dygraphs.html"]').trigger("click"); }, 'show tables' : function() { $('nav a[href="ajax/table.html"]').trigger("click"); }, 'show data table' : function() { $('nav a[href="ajax/datatables.html"]').trigger("click"); }, 'show jquery grid' : function() { $('nav a[href="ajax/jqgrid.html"]').trigger("click"); }, 'show form' : function() { $('nav a[href="ajax/form-elements.html"]').trigger("click"); }, 'show form layouts' : function() { $('nav a[href="ajax/form-templates.html"]').trigger("click"); }, 'show form validation' : function() { $('nav a[href="ajax/validation.html"]').trigger("click"); }, 'show form elements' : function() { $('nav a[href="ajax/bootstrap-forms.html"]').trigger("click"); }, 'show form plugins' : function() { $('nav a[href="ajax/plugins.html"]').trigger("click"); }, 'show form wizards' : function() { $('nav a[href="ajax/wizards.html"]').trigger("click"); }, 'show bootstrap editor' : function() { $('nav a[href="ajax/other-editors.html"]').trigger("click"); }, 'show dropzone' : function() { $('nav a[href="ajax/dropzone.html"]').trigger("click"); }, 'show image cropping' : function() { $('nav a[href="ajax/image-editor.html"]').trigger("click"); }, 'show general elements' : function() { $('nav a[href="ajax/general-elements.html"]').trigger("click"); }, 'show buttons' : function() { $('nav a[href="ajax/buttons.html"]').trigger("click"); }, 'show fontawesome' : function() { $('nav a[href="ajax/fa.html"]').trigger("click"); }, 'show glyph icons' : function() { $('nav a[href="ajax/glyph.html"]').trigger("click"); }, 'show flags' : function() { $('nav a[href="ajax/flags.html"]').trigger("click"); }, 'show grid' : function() { $('nav a[href="ajax/grid.html"]').trigger("click"); }, 'show tree view' : function() { $('nav a[href="ajax/treeview.html"]').trigger("click"); }, 'show nestable lists' : function() { $('nav a[href="ajax/nestable-list.html"]').trigger("click"); }, 'show jquery U I' : function() { $('nav a[href="ajax/jqui.html"]').trigger("click"); }, 'show typography' : function() { $('nav a[href="ajax/typography.html"]').trigger("click"); }, 'show calendar' : function() { $('nav a[href="ajax/calendar.html"]').trigger("click"); }, 'show widgets' : function() { $('nav a[href="ajax/widgets.html"]').trigger("click"); }, 'show gallery' : function() { $('nav a[href="ajax/gallery.html"]').trigger("click"); }, 'show maps' : function() { $('nav a[href="ajax/gmap-xml.html"]').trigger("click"); }, 'show pricing tables' : function() { $('nav a[href="ajax/pricing-table.html"]').trigger("click"); }, 'show invoice' : function() { $('nav a[href="ajax/invoice.html"]').trigger("click"); }, 'show search' : function() { $('nav a[href="ajax/search.html"]').trigger("click"); }, 'go back' : function() { history.back(1); }, 'scroll up' : function () { $('html, body').animate({ scrollTop: 0 }, 100); }, 'scroll down' : function () { $('html, body').animate({ scrollTop: $(document).height() }, 100);}, 'hide navigation' : function() { if ($.root_.hasClass("container") && !$.root_.hasClass("menu-on-top")){ $('span.minifyme').trigger("click"); } else { $('#hide-menu > span > a').trigger("click"); } }, 'show navigation' : function() { if ($.root_.hasClass("container") && !$.root_.hasClass("menu-on-top")){ $('span.minifyme').trigger("click"); } else { $('#hide-menu > span > a').trigger("click"); } }, 'mute' : function() { $.sound_on = false; $.smallBox({ title : "MUTE", content : "All sounds have been muted!", color : "#a90329", timeout: 4000, icon : "fa fa-volume-off" }); }, 'sound on' : function() { $.sound_on = true; $.speechApp.playConfirmation(); $.smallBox({ title : "UNMUTE", content : "All sounds have been turned on!", color : "#40ac2b", sound_file: 'voice_alert', timeout: 5000, icon : "fa fa-volume-up" }); }, 'stop' : function() { smartSpeechRecognition.abort(); $.root_.removeClass("voice-command-active"); $.smallBox({ title : "VOICE COMMAND OFF", content : "Your voice commands has been successfully turned off. Click on the <i class='fa fa-microphone fa-lg fa-fw'></i> icon to turn it back on.", color : "#40ac2b", sound_file: 'voice_off', timeout: 8000, icon : "fa fa-microphone-slash" }); if ($('#speech-btn .popover').is(':visible')) { $('#speech-btn .popover').fadeOut(250); } }, 'help' : function() { $('#voiceModal').removeData('modal').modal( { remote: "ajax/modal-content/modal-voicecommand.html", show: true } ); if ($('#speech-btn .popover').is(':visible')) { $('#speech-btn .popover').fadeOut(250); } }, 'got it' : function() { $('#voiceModal').modal('hide'); }, 'logout' : function() { $.speechApp.stop(); window.location = $('#logout > span > a').attr("href"); } }; }; /* * END APP.CONFIG */ |
Licenses
- Bootstrap progressbar (MIT-licensed)
- Bootstrap Max Length (MIT-licensed)
- Bootstrap Dual Listbox (Apache License, Version 2.0)
- Bootstrap Validator (MIT-licensed)
- Bootstrap slider (Apache License, Version 2.0)
- Bootstrap Tagsinput (MIT-licensed)
- Bootstrap Timepicker (MIT-licensed)
- Bootstrap Wizard (available in MIT & GPL Licenses)
- Bootstrap Colorpicker (Apache License, Version 2.0)
- Clockpicker (MIT-licensed)
- Chart.js (MIT-licensed)
-
CK Editor (available in GPL, LGPL and MPL Licenses)
You can exclude CKEditor plugin if you plan to redistrubute your project under extended license - Datatables (BSD & GPL Version 2 Licenses)
- Datatable Responsive (GPL & BSD)
- Dropzone (MIT-licensed)
- Dygraphs (MIT-licensed)
- Easy Pie (available in MIT & GPL Licenses)
- FastClick (MIT-licensed)
- Flot Charts (customized) - (MIT-licensed)
- Fuel Ux Wizard (MIT-licensed)
- Full Calendar (available in MIT & GPL License)
- Ion Range Slider (MIT-licensed)
- Jcrop (MIT License)
- jqGrid (GPL & MIT Licenses)
- Jquery Form (available in MIT & GPL Licenses)
- Jquery Nestable (available in BSD & MIT-licenseds)
- JQuery UI Touch Punch (available in MIT & GPL Version 2 Licenses)
- Jquery Validate (MIT-licensed)
- JQuery Migrate (MIT-licensed)
- Knob (available in MIT & GPL Licenses)
- Markdown (MIT-licensed)
- Masked Input (MIT-licensed)
- Morris Charts (BSD License)
- MSIE-FIX (MIT-licensed)
- $.noUiSlider (WTFPL[No Restrictions])
- Pace.js (Free of use license - https://github.com/HubSpot/pace/blob/master/LICENSE)
- Select2 (customized) - (Apache License, Version 2.0)
- SelectToUISlider (available in MIT & GPL Licenses)
- SlimScroll (available in MIT & GPL Licenses)
- Summernote (MIT-licensed)
- Sparkline (BSD License)
- Superbox (available in MIT & BSD Licenses)
- ThrottleDebounce (MIT & GPL Licenses)
- TypeHead (MIT-licensed)
- Vectormap (MIT-licensed)
- Xeditable (MIT-licensed)
Licenses below are subject to the license type you own for SmartAdmin
- App.js (this extends to the app.js and its parts for AngularJS Version)
- Bootstrap TREE
- Delete Row
- JarvisWidget
- Smart.chat.ui.js
- SmartNotifications (modified version of MetroNotification)
-
Voice Command
Besides the JS plugins and the included AngularJS directives, all PHP class libs such as the: class.smartui.php, class.smartui-accordion.php, class.smartui-carousel.php, class.smartui-wizard.php, class.smartui-smartform.php, class.smartui-button.php, class.smartui-tab.php, class.smartui-widget.php, class.smartui-datatable.php, and class.smartutil.php are subject to the licensing rights to that of the JS plugins above.
Support Forum
Be sure to check out the support forum!

Please be sure to read our forum guidelines before posting any questions!
Support and FAQs
Q: Can I turn off the responsiveness of the theme?
Responsiveness is built-in to the theme core CSS and bootstrap Core CSS by default. You will not be able to turn off responsive layout without changing a huge portion of the bootstrap CSS core and is generally not recommended.
Q: JarvisWidgets do not change title after I save it, what is going on?
Please remember, jarviswidget uses localStorage to store its location, color and title. You must reset the localStorage if you hardcode the title of the widget.
Q: The demo version of SmartAdmin keeps crashing on my mobile device.
This is perfectly normal and in some cases expected. The demo version of SmartAdmin is built heavily with javascript and was configured in such a way to show its full power, ideally through a desktop. When you create your webapps for mobile, you will not be using so many components at once.
Q: How do I post variables when using the AJAX version?
We added a param URL for the search function that will search for the param text string which you can catch and parse, for example:
<form action="#ajax/search.html" class="header-search pull-right">
  <input type="text" name="param" placeholder="Find reports and more" id="search-fld" />
  <button type="submit">Search</button>
</form>
This will put the a "param" text string to the URL:
smartadmin/?param=my+search+word#ajax/search.html
Q: Some of my graphs do not render when the div/container is hidden
This is a bug related to morris charts and sparkline charts, and not part of SmartAdmin. Morris and sparkline chart cannot render the graphs if the div element containing the graph is hidden in intial load. There might be ways around this but you will need to hack a lot of code, which is genereally not recommend. Best option for such a scenario would be to go with flot.js charts
Q Is there any custom CSS classes that can be used for margins and absolute positions?
Of course! Here are a list of custom CSS classes you can use:
/*
 * Forced text alignments
 */
.text-align-center,.text-center {
    text-align: center !important;
}

.text-align-left,.text-left {
    text-align: left !important;
}

.text-align-right,.text-right {
    text-align: right !important;
}

/*
 * Font Weights
 */
.semi-bold {
    font-weight: 400 !important;
}

.ultra-light {
    font-weight: 300 !important;
}

/*
 * Font Sizes
 */
.font-xs {
    font-size: 85% !important;
}

.font-sm {
    font-size: 95% !important;
}

.font-md {
    font-size: 130% !important;
}

.font-lg {
    font-size: 160% !important;
}

.font-xl {
    font-size: 200% !important;
}

.font-400 {
    font-size: 400% !important;
}

/*
 * Center Canvas
 */
.center-canvas,.center-child-canvas > canvas {
    display: block !important;
    margin: 0 auto !important;
}

/*
 * Margins
 */

.no-margin {
    margin: 0 !important;
}

.margin-top-5 {
    margin-top: 5px !important;
}

.margin-top-10 {
    margin-top: 10px !important;
}

.margin-bottom-5 {
    margin-bottom: 5px !important;
}

.margin-bottom-10 {
    margin-bottom: 10px !important;
}

.margin-right-5 {
    margin-right: 5px !important;
}

/*
 * No border
 */
.no-border,.well[class*=" bg-"].no-border {
    border-width: 0 !important;
}

.no-border-transparent {
    border-color: transparent !important;
}

.no-border-radius {
    border-radius: 0;
    -moz-border-radius: 0;
    -webkit-border-radius: 0;
}

/*
 * Inlines
 */
.display-inline {
    display: inline-block !important;
}

.display-normal {
    display: inline !important;
}

/*
 * Images
 */
.hover-transparent {
    opacity: .5;
}

.hover-transparent:hover {
    opacity: 1;
}

/*
 * JUST A BORDER
 */
.bordered {
    border: 1px solid rgba(0,0,0,.2);
}

.bordered:hover {
    border: 1px solid rgba(0,0,0,.4);
}

/*
 * CURSORS
 */
.cursor-pointer {
    cursor: pointer;
}
.padding-5 {
    padding: 5px !important;
}

.padding-7 {
    padding: 7px !important;
}

.padding-10 {
    padding: 10px !important;
}

.padding-top-10 {
    padding-top: 10px !important;
}

.padding-bottom-10 {
    padding-bottom: 10px !important;
}
Q: Do you have plans to release this in IE8 version?
At the moment, no we do not, but there should be ways to convert the pure HTML_version to IE8 format using respond.js and various plugins and hacks. We simply cannot gaurantee this, but in theoriy it should be doable.
What we actually support...
Please understand that we produce 'Front-End' templates to help you save time and speed up your project. We do not offer tutorials on "how to implement" or offer support for plugin customization.
Rules for support ticket:
- You have gone through the documentation and was unable to find a solution
- You have not changed the physical / DOM structure of the template
- You have not included additional scripts that maybe conflicting with the theme plugins
- You have uploaded your scenario to a server for me to see and debug the issue (screenshots MUST be provided if it is a visual related issue)
- You MUST provide your product license ID and the date you found this bug
- You MUST provide the version of SmartAdmin you are using (HTML, AJAX, PHP or AngularJS)
- You MUST provide your screen resolution, your browser version and your OS
- Please note I do not provide extended support for third party plugins (combining two or more plugins to achieve certain result)
- I treat all my customers equally, if I didn't respond to your email, most likely you are still in que and I did not get to you yet ^_^
All support tickets must be emailed to support@myorange.ca
Upgrade Instructions
Version 1.8.2 Changelog
We have updated all plugins for the HTML and the AJAX version of SmartAdmin. Please see the following change log DOM-changes-1.8.2.txt and plugin-version-changes-1.8.2.txt for the details.
Upgrade instructions:
- Backup your project so you can always go back to previous files if needed
- Copy over CSS/Font/JS directory to your project (replacing old)
- Check the "DOM-changes-1.8.2.txt" file to find the change needed in your HTML code to update some of the plugin
- Most plugins should work without any DOM changes
Upgrading from version 1.4.1 to 1.5
-
Updating HTML and AJAX versions
- Copy and replace the CSS folder with latest (please note that we added a new css file by splitting the production css into two files)
- Replace the previous JS folder with latest (if you made changes to your app.config.js, you may need to preserve the change and using file compare bring in the new changes from the new app.config.js file)
-
If you want to utilize the pageDestroy() function for AJAX version you must look at the examples in some of the pages (eg. dashboard.html) and follow the new scripts - this is not a must but needed to free up memory for your app
-
Updating PHP version
- Follow steps 1.1 and 1.2 (from above)
-
Copy over the SmartUI Classes (these classes now use the latest version of php 5.5)
-
Updating AngularJS version
- No upgrade path exists since this is a complete rewrite of this version
- Our appologies if this causes you a lot of extra and/or additional work
Upgrading from version 1.4 to version 1.4.1
- Update app.min.js with new
- Add the new JS file "app.config.js" (place it after jquery-ui library call)
- Update js/plugins, js/smartwidgets, and js/notifications folders
- If you plan to use voice command copy the new DOM element #speech-btn and add the plugin speech/voicecommand.min.js after app.js
- For PHP Users, please update class.smartutil.php
Upgrading from version 1.3 to version 1.4
There were significant number of improvements made to version 1.4
- Removed ID #project-context and replace with class .project-context
- The function "nav_page_height()" has been made redundant, you can remove this function wherever you used them before
- Add the data attribute data-action="resetWidgets" to #ribbon > span > #refresh
- Add the data attribute data-action="toggleMenu" #hide-menu > span > a
- Add the data attribute data-action="userLogout" #logout > span > a
- Add the data attribute data-action="launchFullscreen" #fullscreen > span > a
- Add the data attribute data-action="toggleShortcut" #show-shortcut
- Add the data attribute data-action="minifyMenu" span.minifyme
- Replace the old JS folder and everything in it with the new JSfolder of version 1.4
- Replace the CSS folder and everything in it with the new CSS folder of version 1.4
- Add the new image files and folders to your current img folder
- OPTIONAL: To save memory for AJAX version we have moved all functions to be called inside var pagefunction = function() function. You may feel the need to update to this methodology, but you don't have to.
Upgrading from version 1.2 to version 1.3:
There are no particular DOM changes to look for, you will simply copy and paste all files and folders relating to plugins, app.js, and CSS files over to your project and it should adap to the new changes wihtout any further effort.